How To Make A Skinny Bench

Hello, fellow DIY enthusiast! Are you excited to explore some woodworking? Building a skinny bench for your home is the perfect way to start your DIY journey. Don’t worry; I will guide you through it step by step.
Skinny Bench Tutorial
Get ready to learn how to create your own Skinny Bench – the perfect addition to your home, crafted with your hands. Whether you’re a seasoned DIYer or just starting out, I’ve got you covered with step-by-step instructions that make building a bench for your home a breeze. Let’s empower those creative hearts and bring your vision to life – one project at a time!

Get ready to flex those creative muscles, impress your friends, and make your space shine – all while having a ton of fun in the process! Let’s get those hands dirty (with sawdust) and build the bench of your dreams.
Supplies:
- Pocket Hole Jig
- Cordless Planer
- Safety Glasses
- Screws
- Stain
- Whitewash
- Glue
Building A Skinny Bench
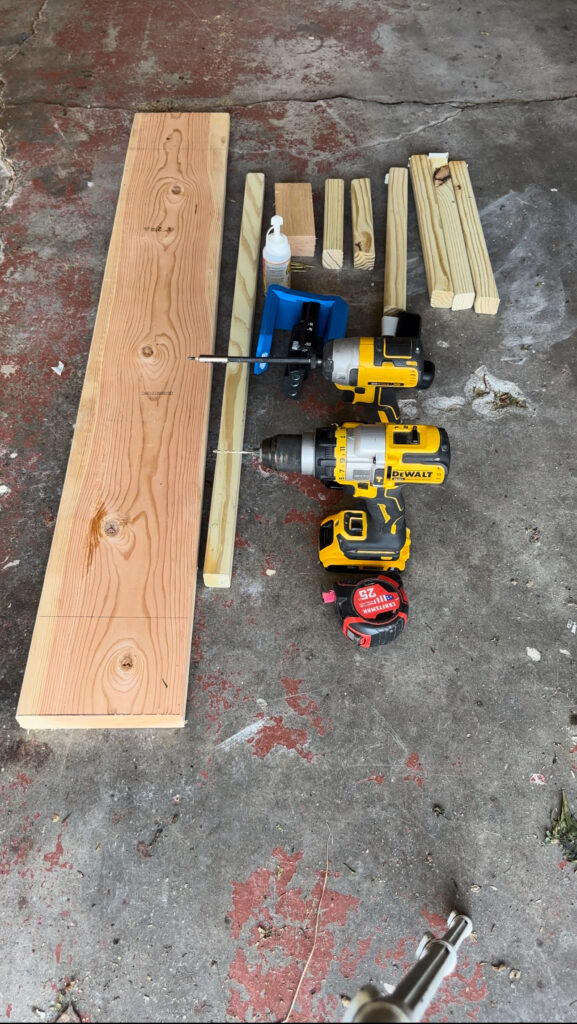
- Choose a 2×6 piece of fir or pine for your bench’s top.
- Determine the desired length for your bench and mark it using a speed square.
For the legs and braces, use 2×2 lumber. Cut the legs at a 10-degree angle on one side to make the bench more stable. The braces should also be cut at 10 degrees, but on both sides, ensuring they run in opposite directions. Note that the longest brace should be cut straight without an angle.
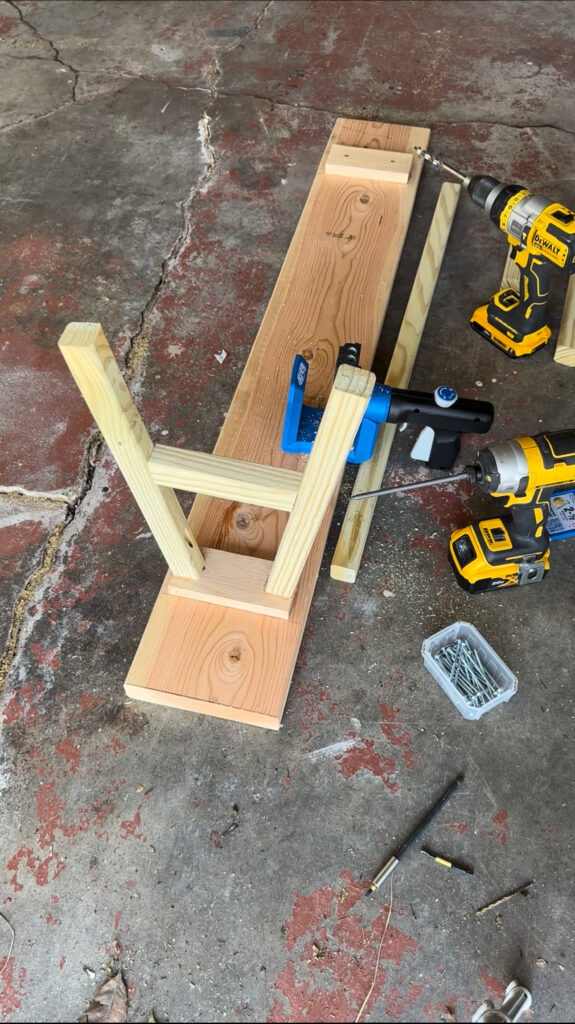
Assembling The Bench
- Assemble the bench by attaching 1×3 boards to the bottom of the 2×6 top. These boards will serve as the base for the legs. Secure them in place using glue and self-tapping screws.
- Attach the legs by using a pocket hole jig to create pocket holes in each leg. Drill these holes on the side with the angle, specifically where the leg reaches a point. Then, attach the legs using pocket hole screws and wood glue.
- Once both legs are securely attached, proceed to attach the leg brace. Drill pocket holes on the backside of the braces for a secure connection. Repeat this on the opposite side.
Distress The Wooden Bench
- To distress the bench after construction, use a reciprocating saw. There’s no specific technique for distressing, so feel free to be creative. Afterward, use a planer to smooth out any sharp or rough edges.
Staining A Skinny Bench
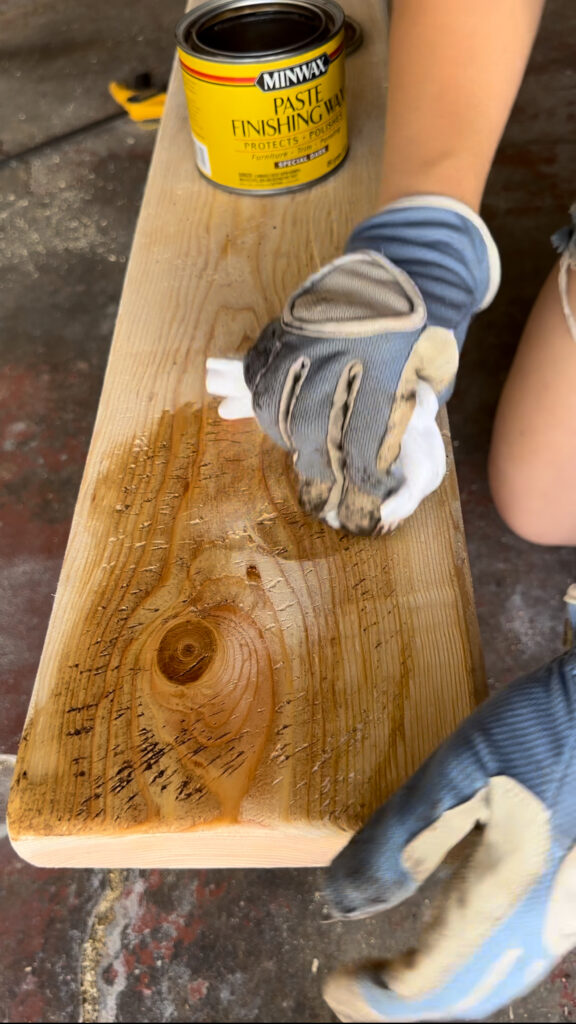
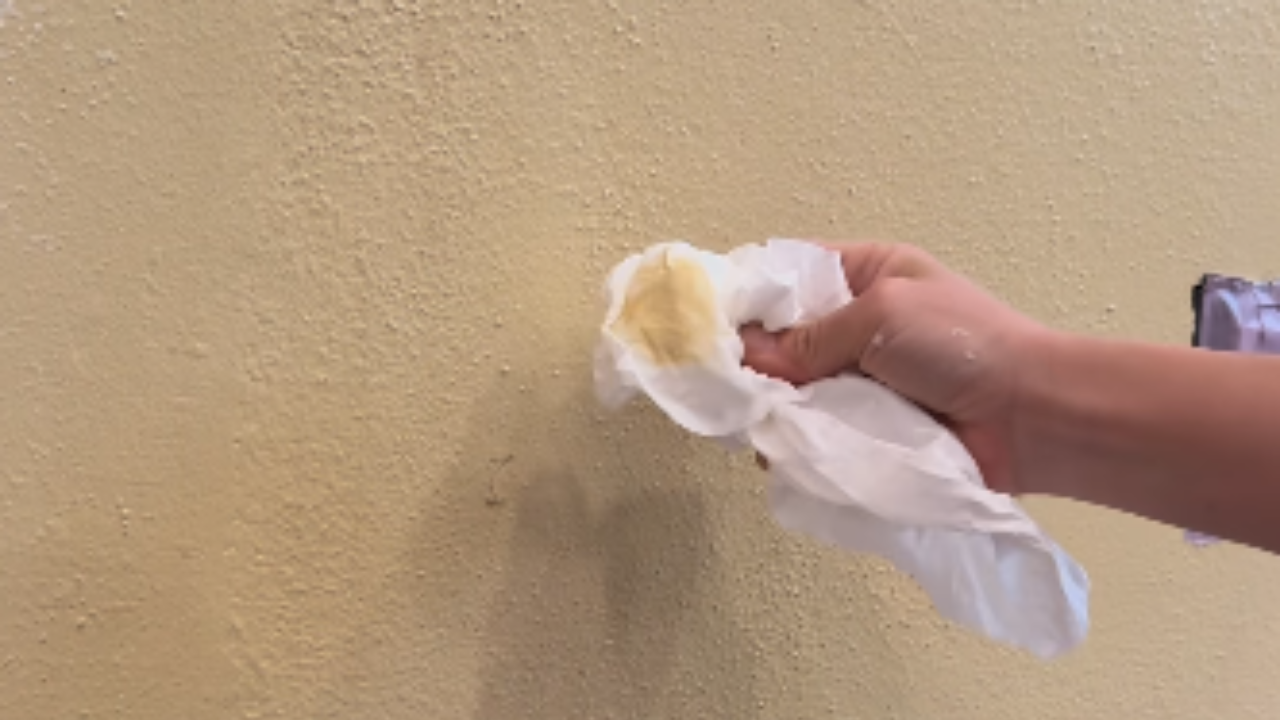
- Apply a special dark finishing wax; I used Miniwaxusa to fill in any dents and dings you’ve created during the distressing process.
- Use a white stain or whitewash to cover the entire bench. Then apply your stain of choice. You don’t need to wait for the whitewash to dry before applying the stain; you can layer them together.
Tips and Tricks
- Before screwing in the screws, make sure to pre-drill holes into your 1×3 boards using a drill bit. This will prevent the wood from splitting and make screwing them in easier.
- When attaching the leg brace, consider using a right angle drill attachment. It simplifies the process and allows for better access to tight spaces.
- If your bench features two different types of wood, you can use a white stain to help blend them together. This will make your bench uniform and hide any contrast between the wood types.
What Type Of Wood Do You Use To Make A Skinny Bench?
The type of wood you use to make a bench can vary depending on your preferences, budget, and the intended use of the bench. Common choices for bench-making wood include:
- Pine: Pine is a softwood that’s readily available and affordable. It’s easy to work with, making it a good choice for beginners.
- Cedar: Cedar is a softwood that is naturally resistant to decay and insects, making it an excellent choice for outdoor benches.
- Oak: Oak is known for its strength and durability. It’s a great choice for indoor benches and can be stained or finished for a polished look.
- Maple: Maple is another hardwood that’s strong and durable. It’s often chosen for its fine grain and light color, making it suitable for indoor benches.
- Birch: Birch is a relatively affordable hardwood with a pale color, making it a good choice for indoor benches when you want a clean, light look.
- Mahogany: Mahogany is a hardwood known for its rich, reddish-brown color and durability. It’s often used for fine indoor furniture.
The choice of wood should align with your project goals, whether it’s for indoor or outdoor use, your design preferences, and your woodworking skill level. Always consider the wood’s natural characteristics, cost, and maintenance requirements when selecting the type of wood for your bench project.
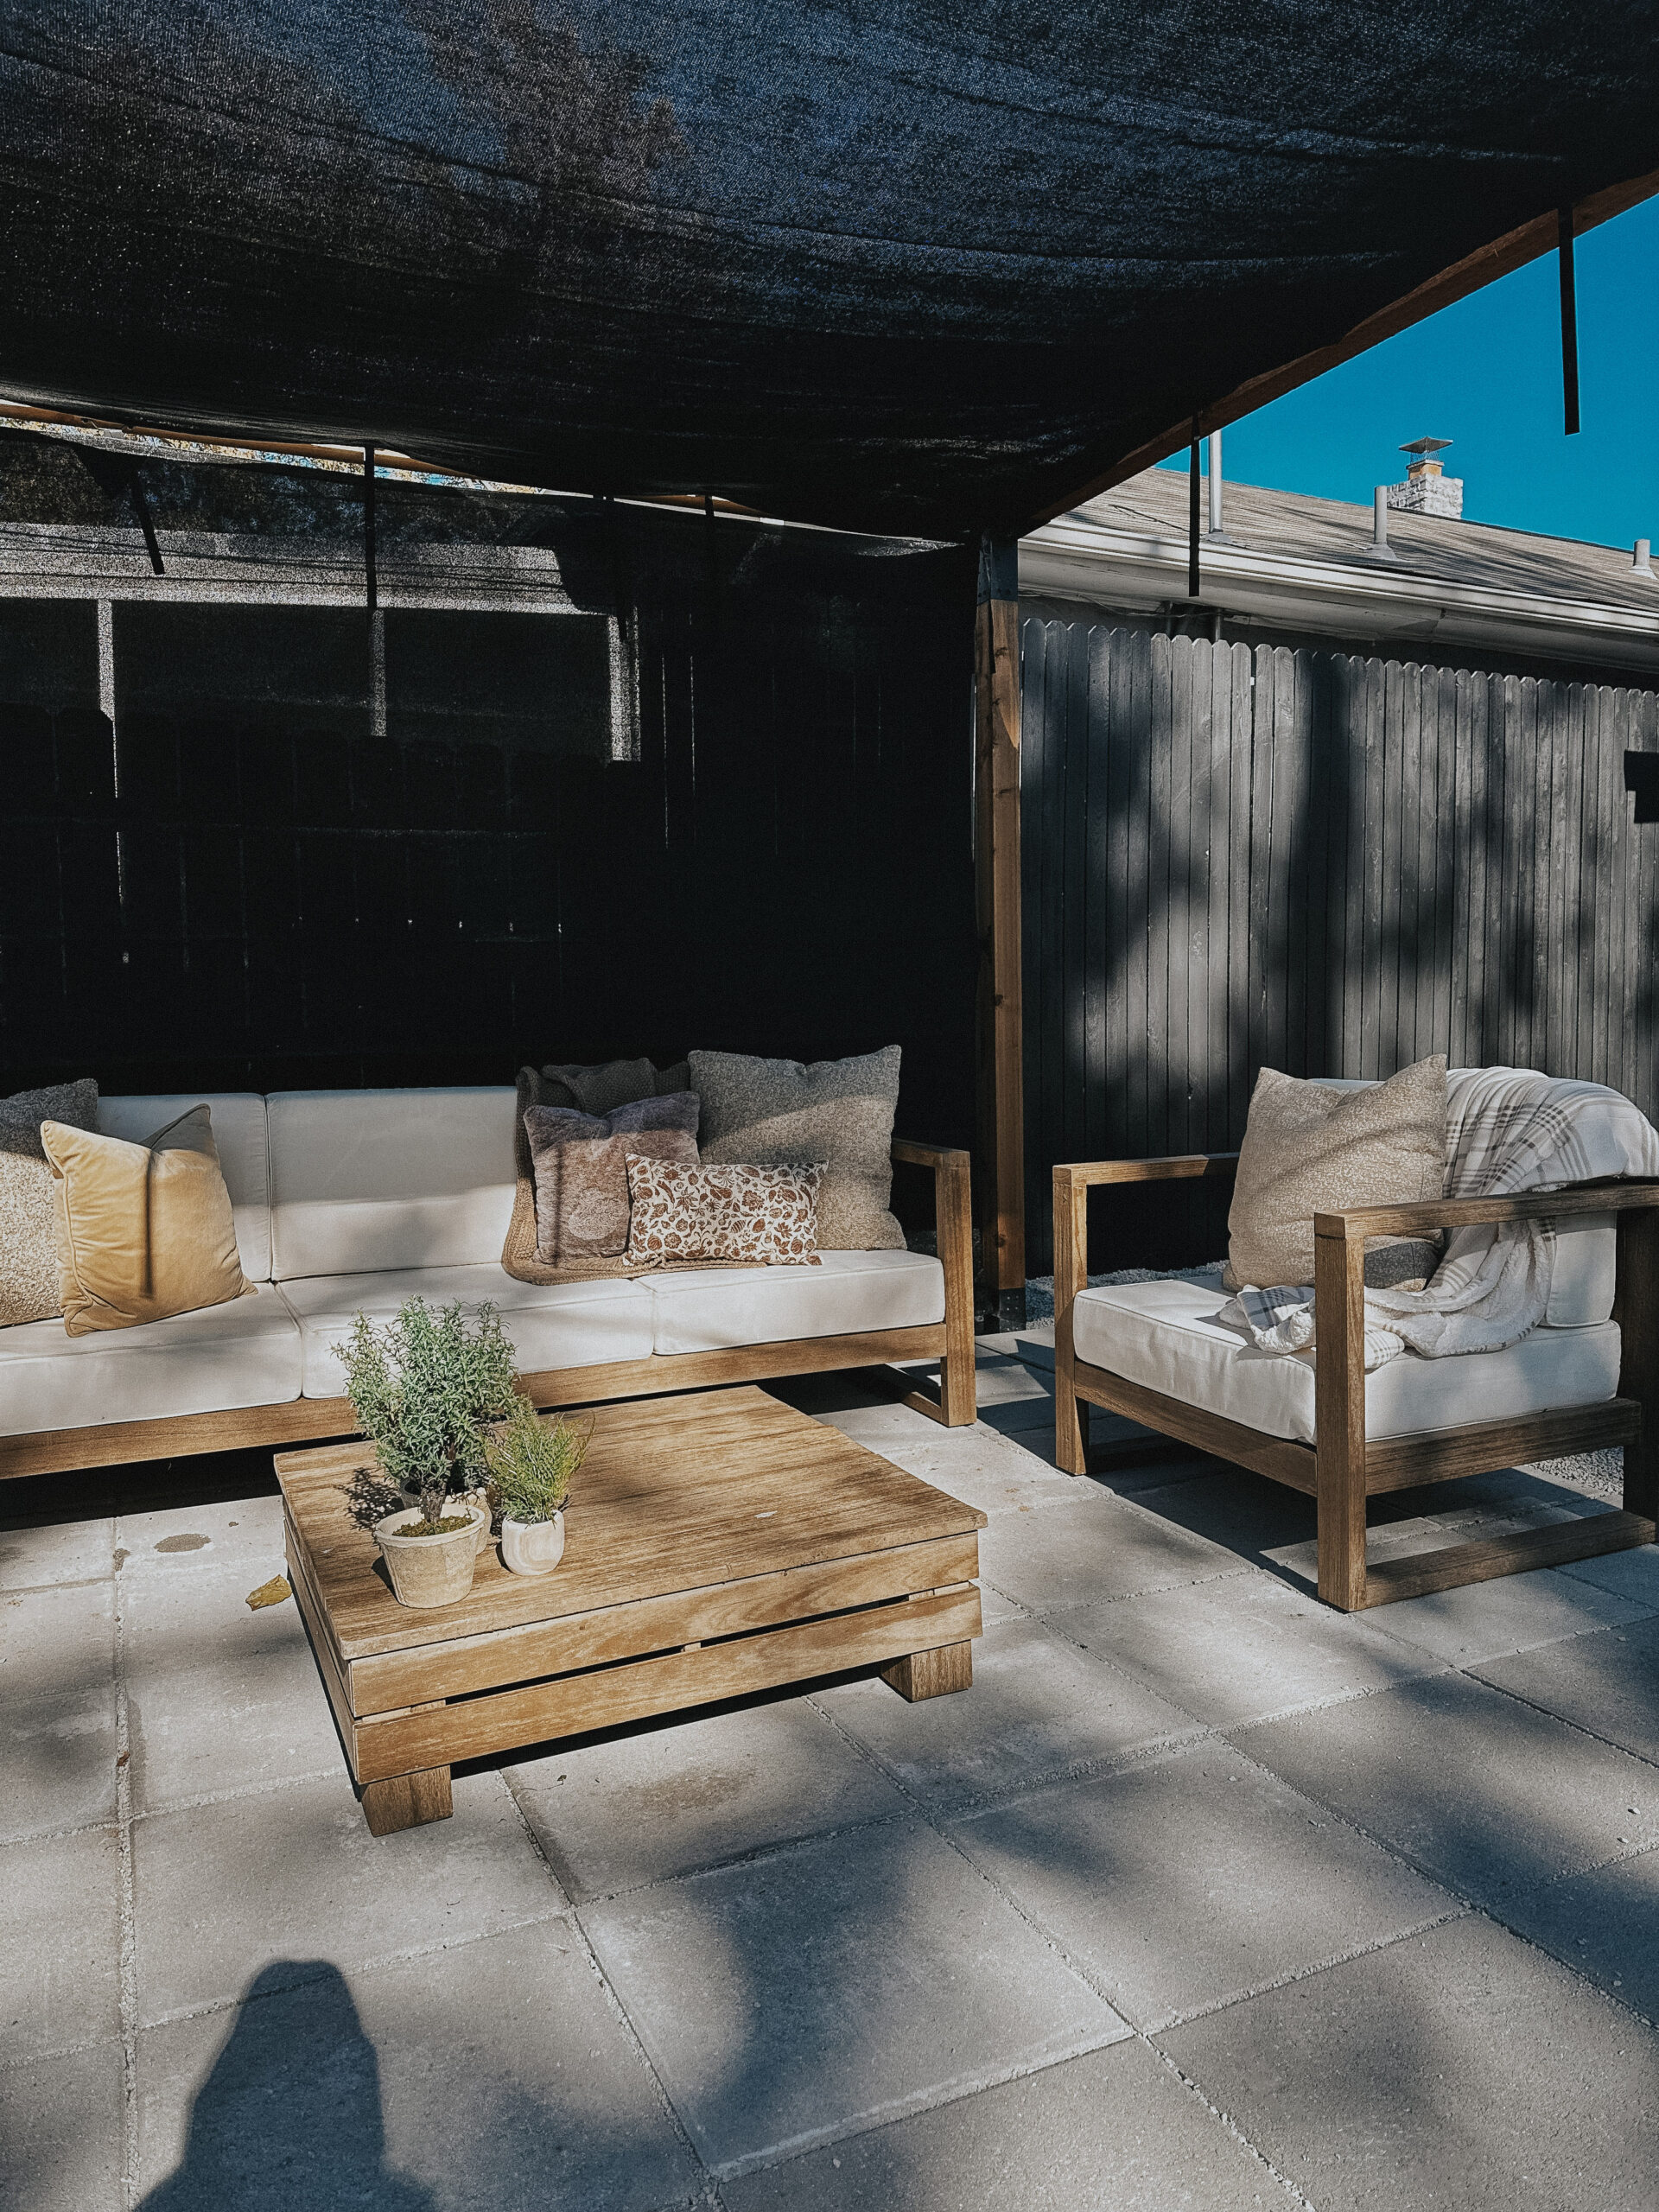
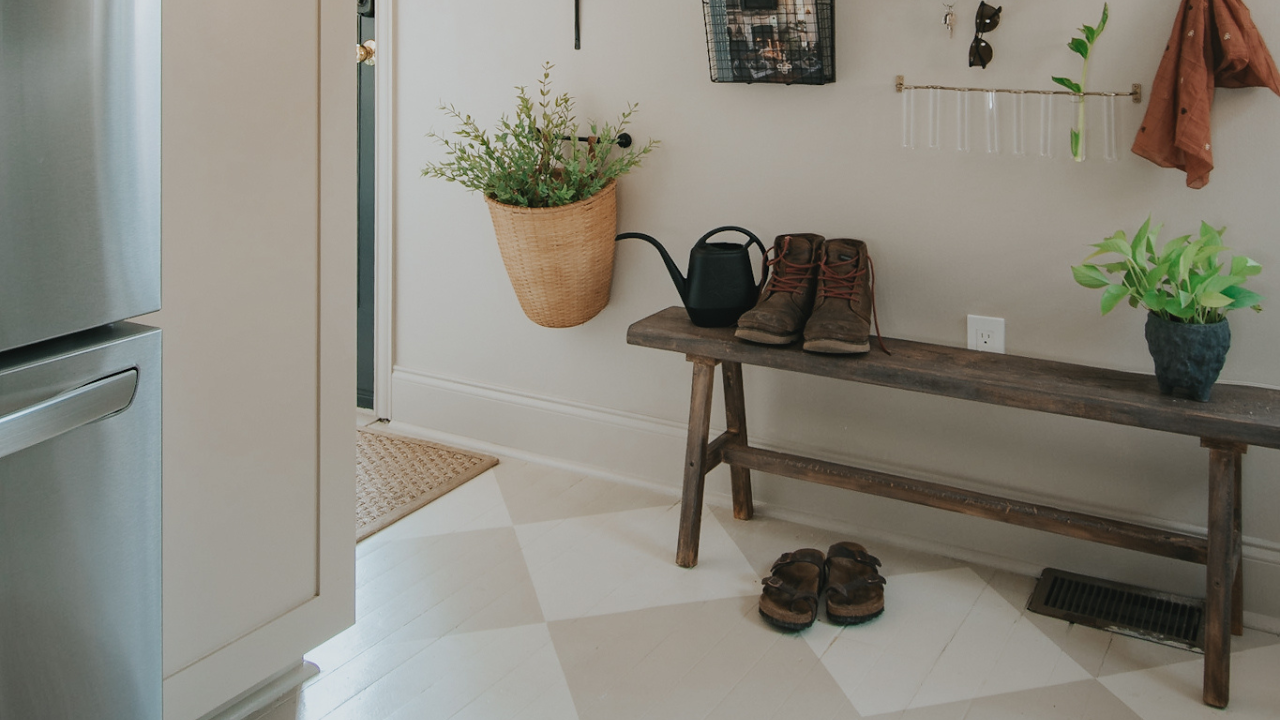
How To Style A Skinny Bench
There are no strict rules when it comes to styling a skinny bench. I suggest experimenting with different elements, colors, and arrangements until you find a look that suits your taste and complements your home’s aesthetic. The key is creating a welcoming and visually appealing space that reflects your style.
Remember, the journey of building this DIY skinny bench is just as rewarding as the finished product. Embrace the learning process, relish every moment spent on this DIY project, and don’t be afraid to put your personal touch on your creation. Whether you’re crafting this bench for extra seating, decor, or both, you’re taking a step toward becoming a more skilled and confident DIY enthusiast.
Leave a Reply
I create some affiliate links through the Amazon Influencer program and the LTK platform. Because of this, I have the ability to earn small commissions from some purchases that you make while using my links (at no cost to you!). I so appreciate your support.