
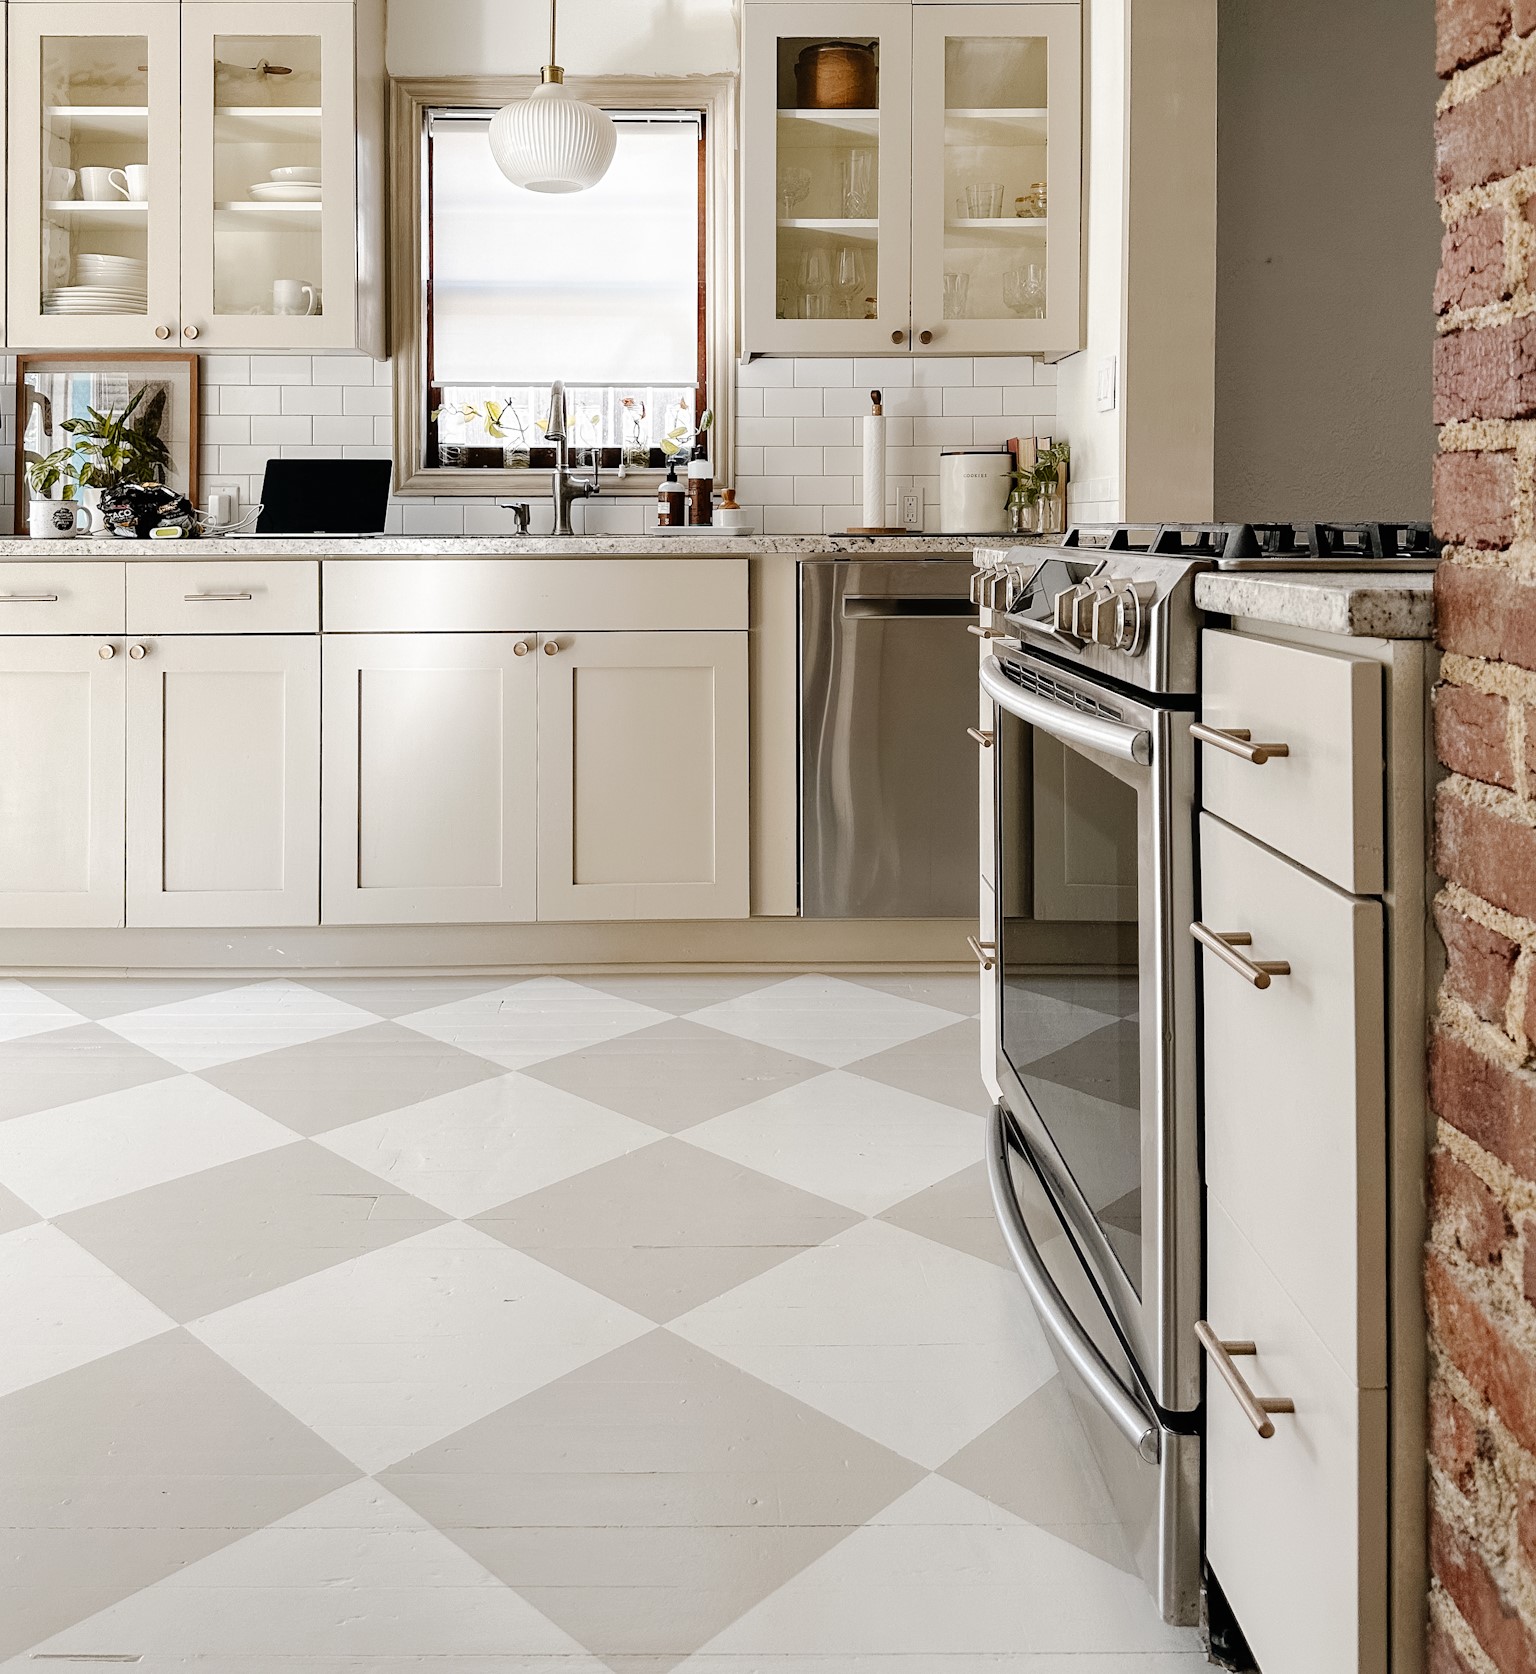
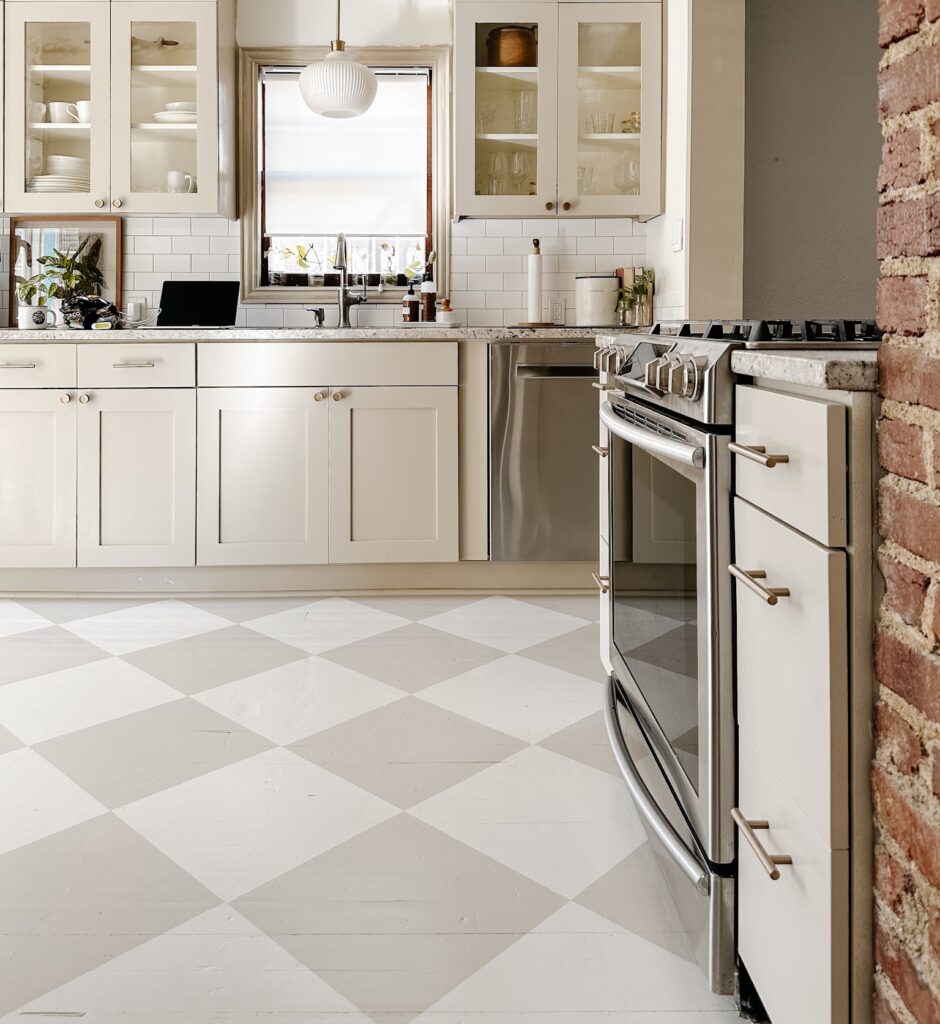
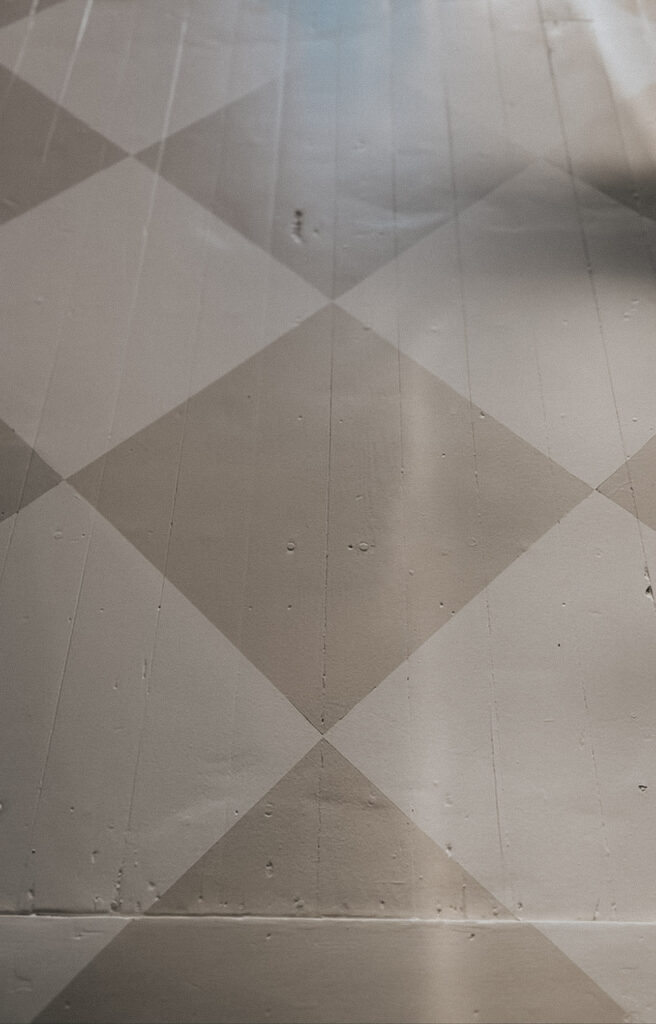
Painted Harlequin Floor

My kitchen now rocks a painted harlequin floor. Why? And what does harlequin mean? First of all, harlequin is, in the simplest terms, a checkerboard pattern on a diagonal.
And why paint your wooden floor? Maybe your floor is in bad condition. Perhaps your floor is a terrible color. Or you’re anxious for a change. Whatever the reason, I’m here for doing what you want in your own home (unless you’re ruining really quality antique wood – and yes, I understand the irony).
Our Kitchen Floor {the backstory}
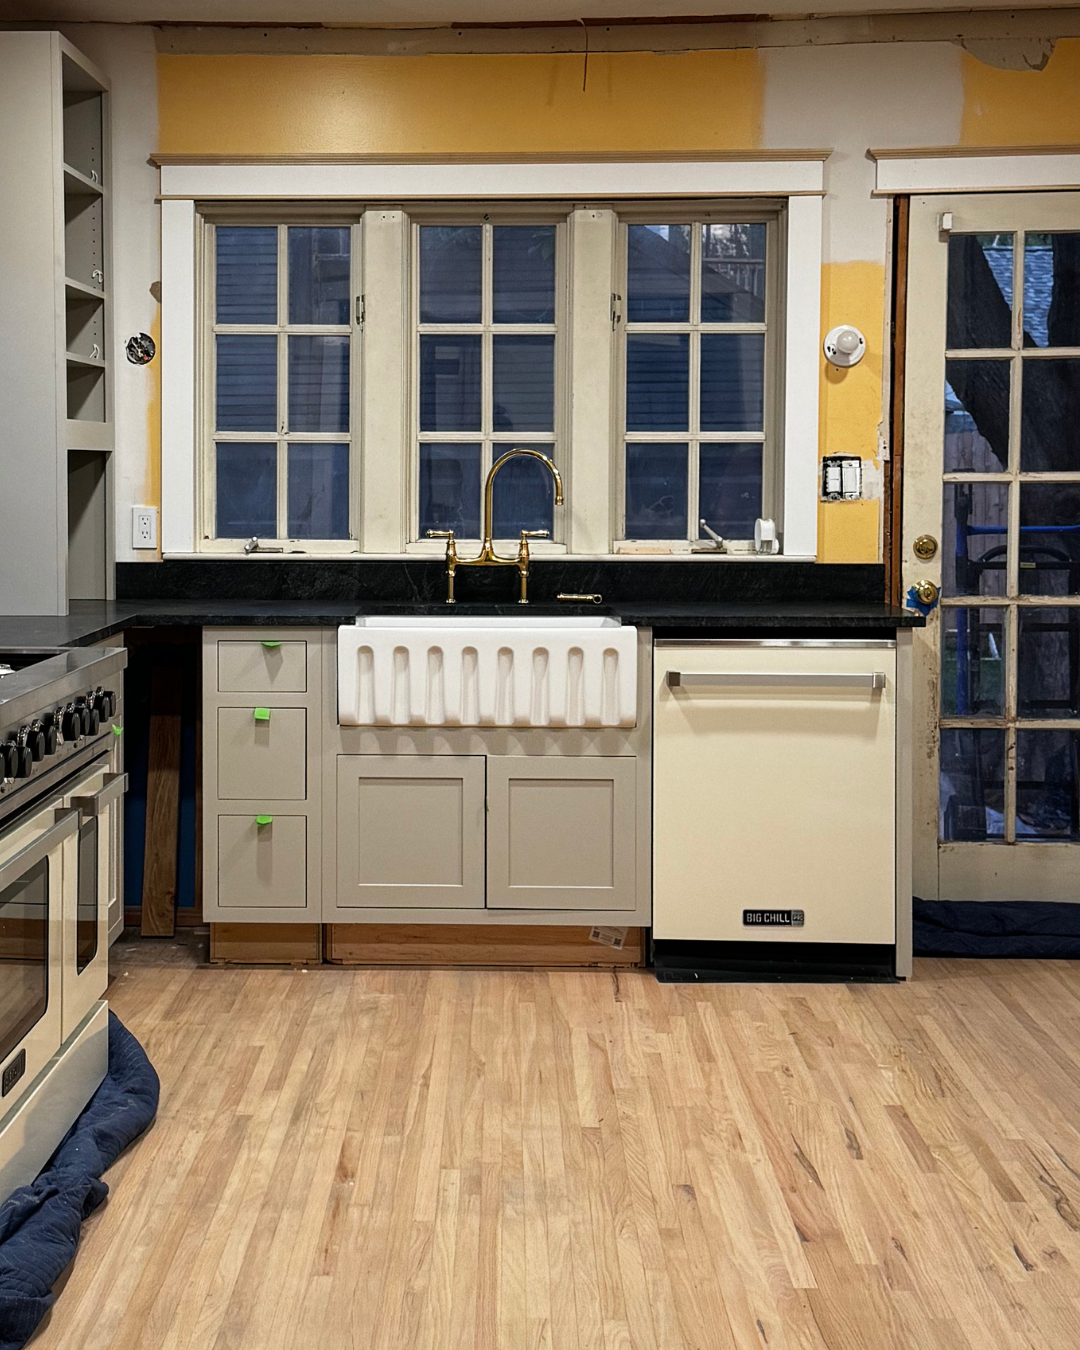
Some day I’ll tell you the story of tearing up our brick paver kitchen floors to try to rescue the original wood floors (or you can find it yourself if you scroll wayyy back through the highlights on my Instagram page). But long story short, I spent a lot of my life trying to bring them back to life. I finally accepted that the fir was too damaged (and they didn’t flow with our original oak floors you can see in our dining room). So I painted them a solid color (accessible beige at 50%, don’t you know me at all?).
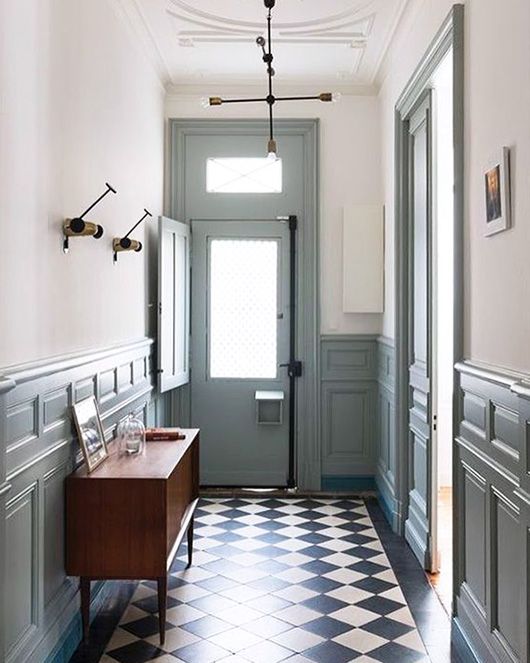
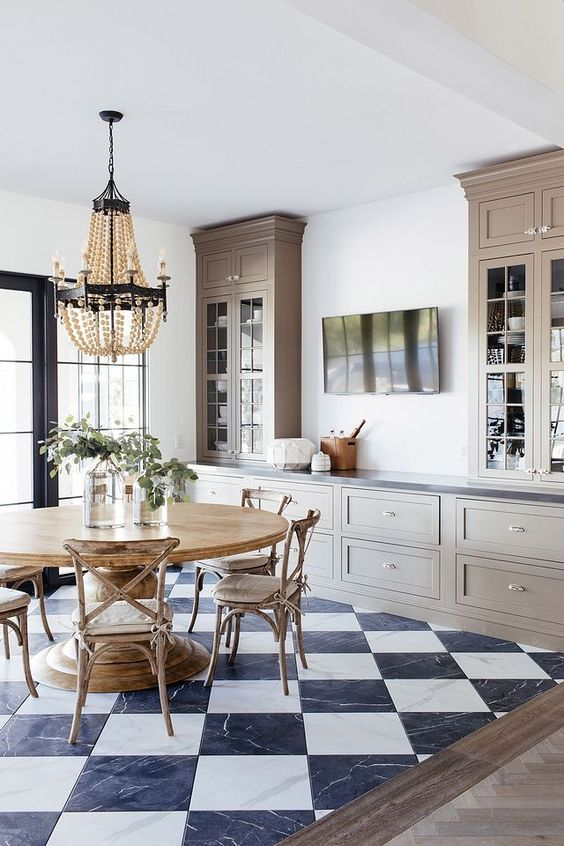
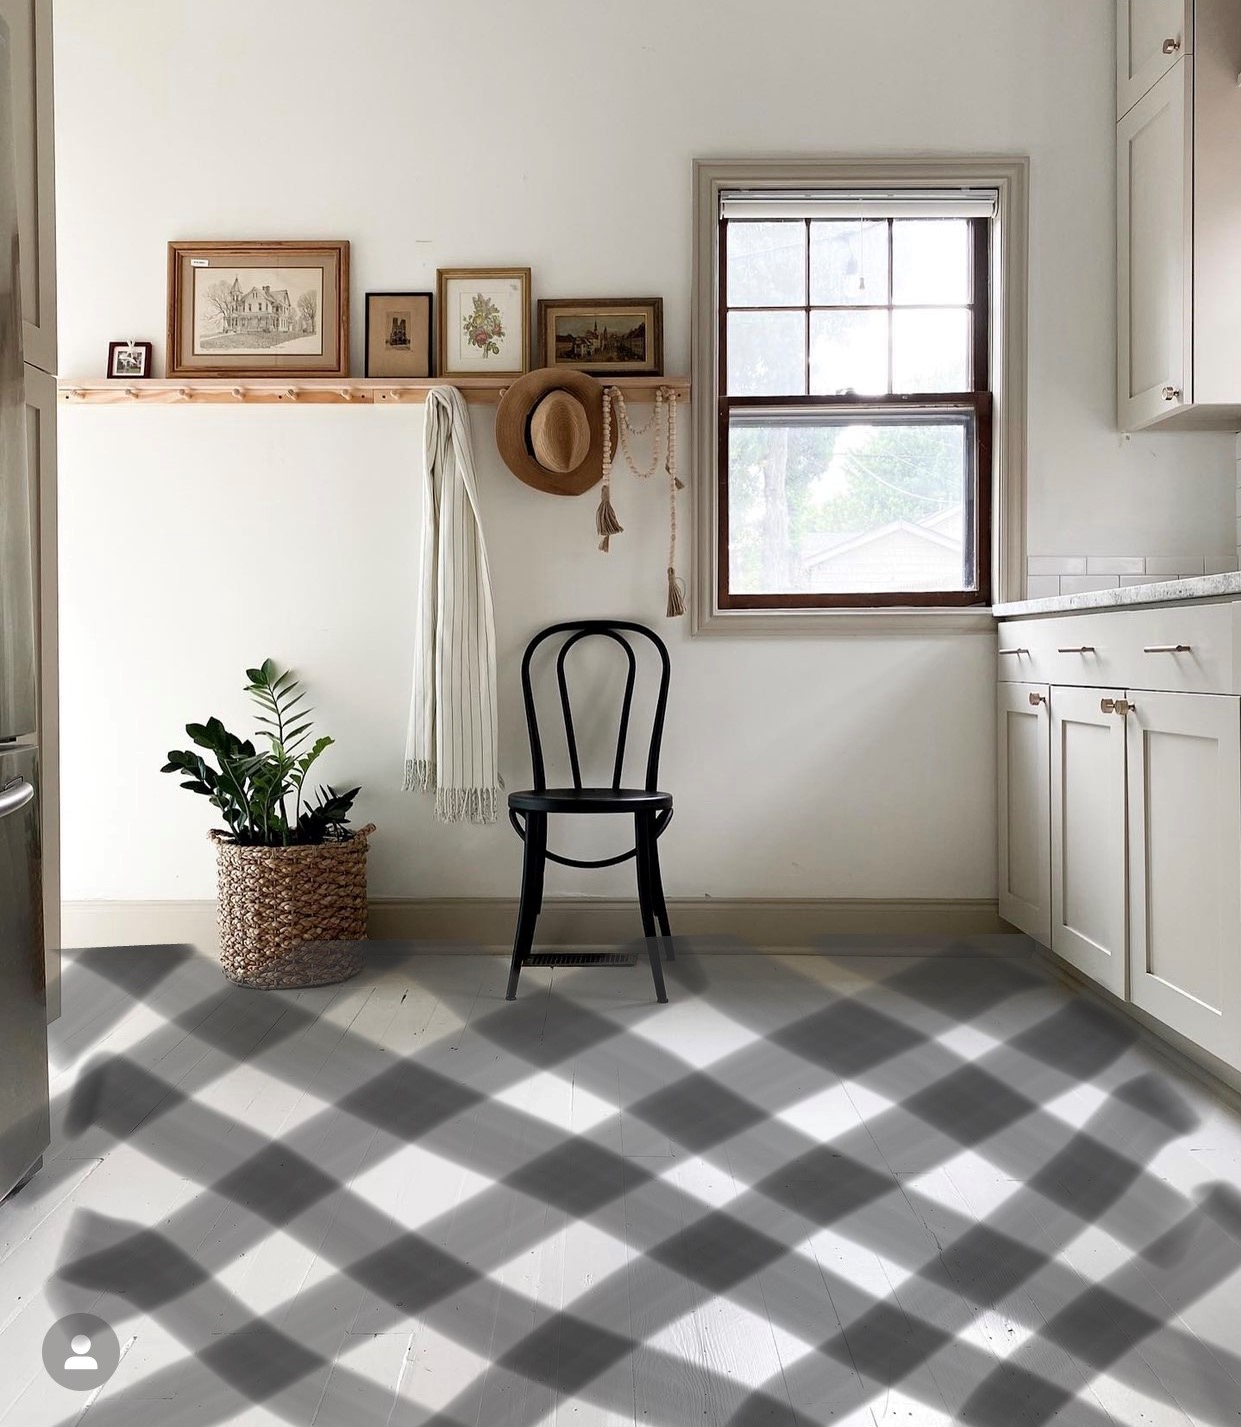
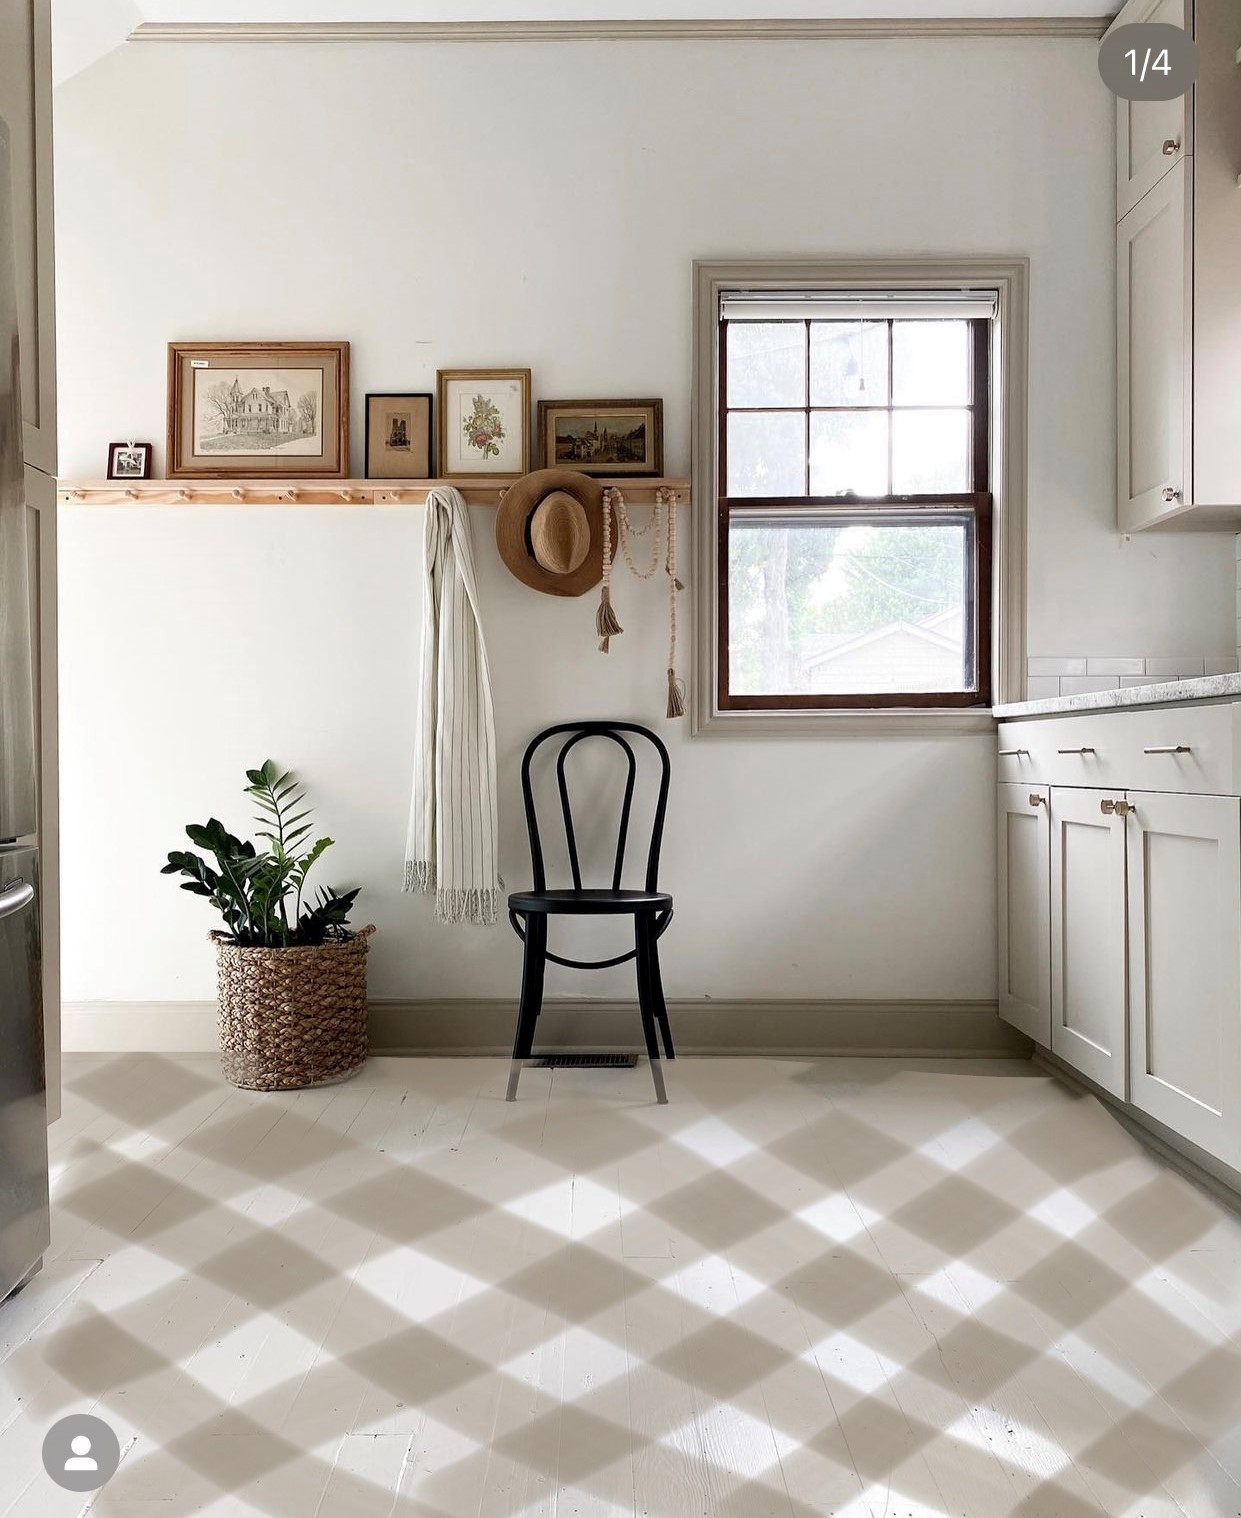
But this summer I decided that I was ready for them to be just a *bit* more fun… while still rocking the neutrals that I love. I drew inspiration from these photos (below), but I felt like blacks and grays were a bit much for my simple little kitchen.

I mocked up two quick options, one with the gray that I was seeing everywhere, and one with my kitchen colors (current floor color and current cabinet color). It was immediately obvious to me that the second option would allow me to have fun floors without them stealing all of the attention from the kitchen and screaming “LOOK AT THE FLOOR” every time someone walked in.
The Controversy
Not going to lie – I got some hate from this project, so here are my disclaimers.
- If these floors were the beautiful original oak floors we have in the rest of the house, we wouldn’t be having this conversation – when I refinished them I would have kept them natural!
- If your floors aren’t in great condition, consider if you’d like the texture if the color was different.
Spoiler: SO good.
With all of that housekeeping out of the way, I’ll assume that you’re here to learn how to create your own painted harlequin floor, so here we go!
NOTE: I’ve linked all sources at the bottom of this tutorial!
Painted Harlequin Floor Tutorial
Clean your floor! Dirt, grease, grime, etc. will make your floors look terrible, and the paint won’t adhere properly. So scrub the floor. If your floors are greasy or tacky, use TSP. Depending on the surface, you may need to sand it a bit or start with a primer designed to attach to tricky surfaces. I’ve heard good things about Zinsser, but it really depends on your situation. May I suggest a quick google search?
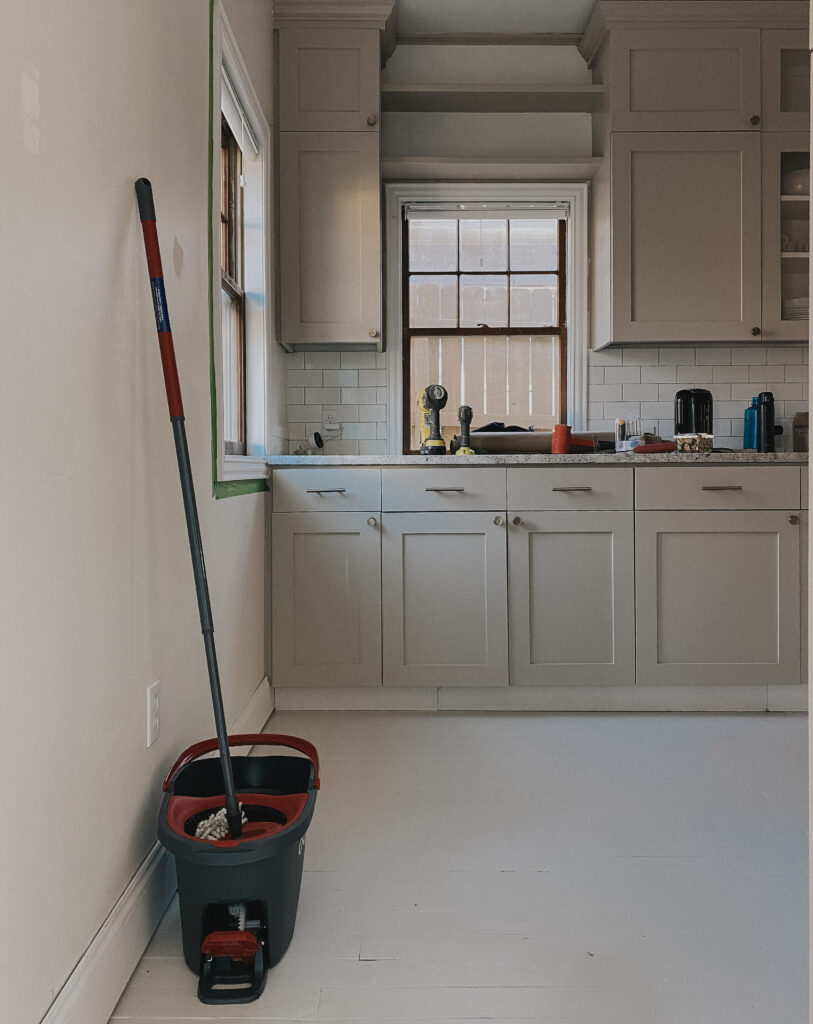
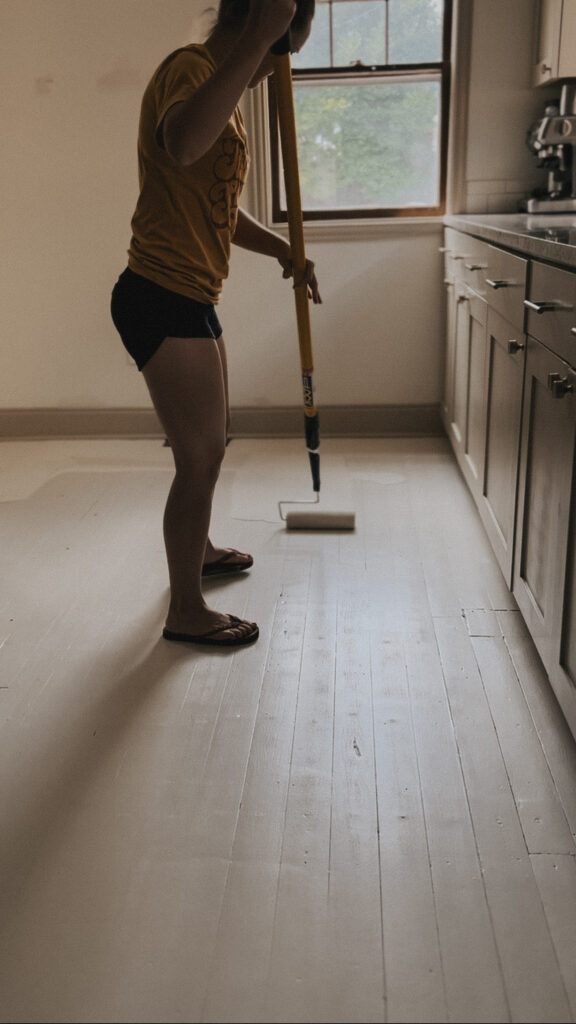
Vacuum the floor right before you paint, and keep all inhabitants of your house out of the space. No wives, husbands, kids, or furry friends allowed. Paint the base color, let it dry, then paint another coat. My base color was Accessible Beige by Sherwin Williams, color matched to Behr paint at 50%.
What does it mean to get paint mixed at __%?
Have you heard someone say that they mixed their paint at 50%? This means that when they mix the paint, they’re only putting 50% of the tint into the paint. So you have the exact tone as the original color, but it’s 50% lighter. You could obviously play around with different percentages if you like, or even try getting paint mixed above 100% for a deeper hue of the original color.
Harlequin Scale
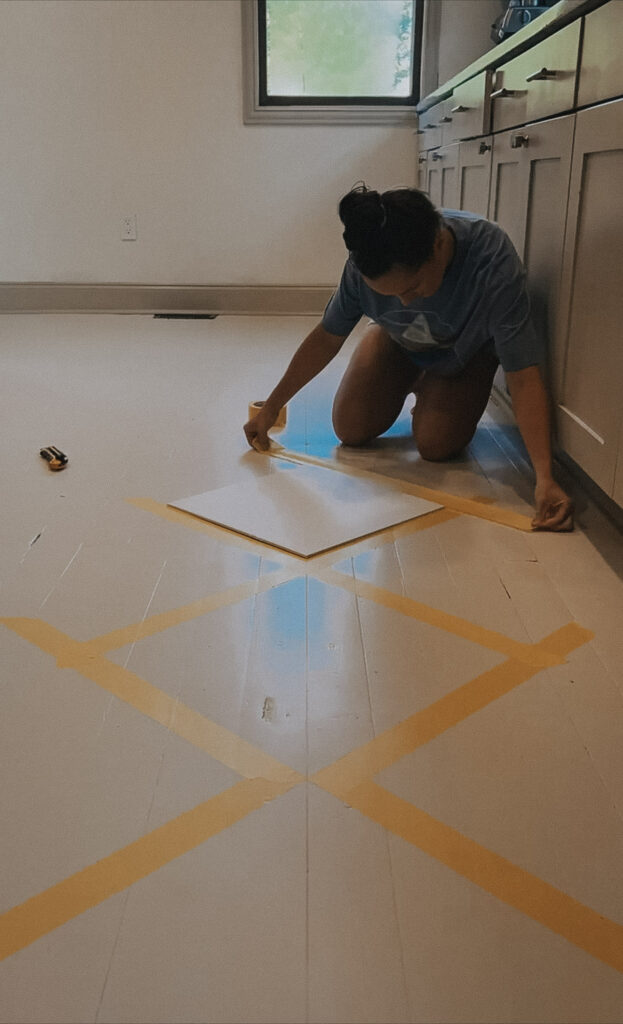
Deciding what size you want your squares is the very first part of the design process. I chose to go with 16″ squares based on the following considerations: the size of my space, the scale, and where the squares would begin and end. Just like in tiling, you want to avoid awkward spots as much as possible, so taking the time to map everything out in advance is key. (Pro Tip: I used this free online planner.)
I used foam poster board to create several 16″ square pieces as a template. I chose the doorway that I wanted to have the best transition (just like you do while tiling), then taped out the squares with yellow frog tape. This tape was designed for delicate surfaces – I’m looking at you, freshly painted base coat.
Most rooms aren’t perfect squares, so I did the spaces that were easy, then cut the templates as needed to get the tricky spots. You could also use a level, straight edge, or laser level at this point.
Crisp Lines
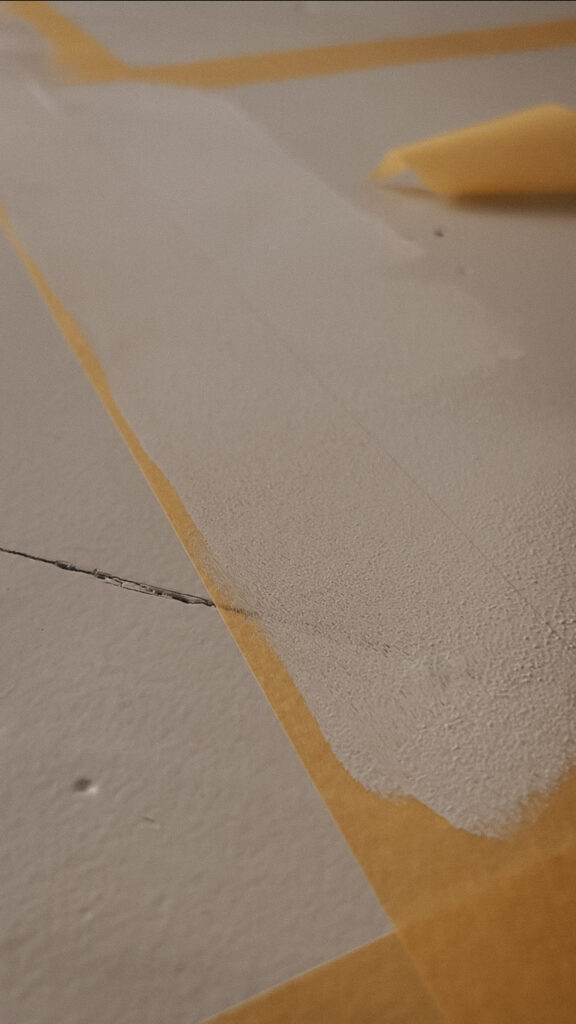
Press the tape down really firmly. Run a credit card over the edge to make sure everything is sealed well. If there are corners with tape overlap, cut them with an x-acto knife or really sharp utility knife blade.

When everything is taped well, make sure the floor is clean (you know the drill), take your BASE COLOR (Accessible Beige at 50% for me), a roller, and roll paint over the tape. If you’ve been around IG/Tiktok for a while, you’ve probably seen this method used, but let me explain how this works.
Why painting over your tape line works:
Paint is going to bleed under tape. It’s just a fact of life. Paint is liquid, and it acts like a liquid – no matter how great of a taping job you did. By painting the base color first, you’re controlling what color seeps underneath. Since you won’t notice tone-on-tone color seepage, you’ve won. When the base color paint dries, it creates a solid seal. When you do your secondary color, nothing can get underneath the tape. You should have a really crisp line when you’re done!
Note: If you have heavy texture on walls, you could try this with paintable caulk instead.
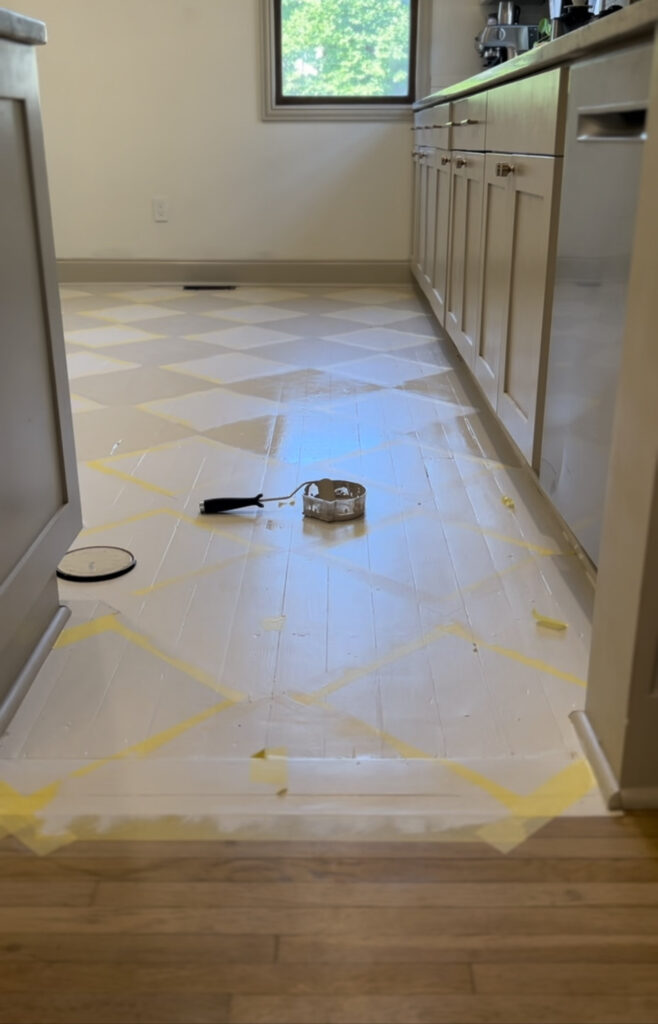
The Fun Part
Now you’re ready to go! Using a small roller and your secondary paint color (I chose Shiitake by Sherwin Williams, color matched by Behr), paint every other square. I marked these with a piece of tape ahead of time just in case my brain was lost in a podcast or some good music. Now squint – you can see your painted harlequin floors! When these dry, paint them one more time.
Now carefully peel the tape and cry because it looks so dang good!
Getting the tape off cleanly:
1) Pull the tape off as soon as you finish that second coat – or right after it’s no longer tacky, because if the paint cures, it’s much harder to remove cleanly.
2) It helps to peel the tape slowly back towards itself. Don’t hold it at 90° because that could cause your tape to pull the paint up. Keep your hand close to the ground while moving your hand back over the tape that hasn’t been peeled yet.
Note: It’s not the end of the world if there are little spots to fix. Expect this because life is messy. Get a tiny paintbrush, and after the floors are dry, you can do touchups with each color as needed.
Almost Done!
You did it! Now before you have a celebration dance on the new painted harlequin floor, you want to protect it long-term. That means it’s time to break out the clear finish (don’t use polyurethane because that will yellow as it ages). You’ll cut in the edges with a brush, and roll the rest – just like you did while painting. I suggest doing three coats to protect it well, and sand lightly between coats if your sealer requires it so that the next coat grips well.
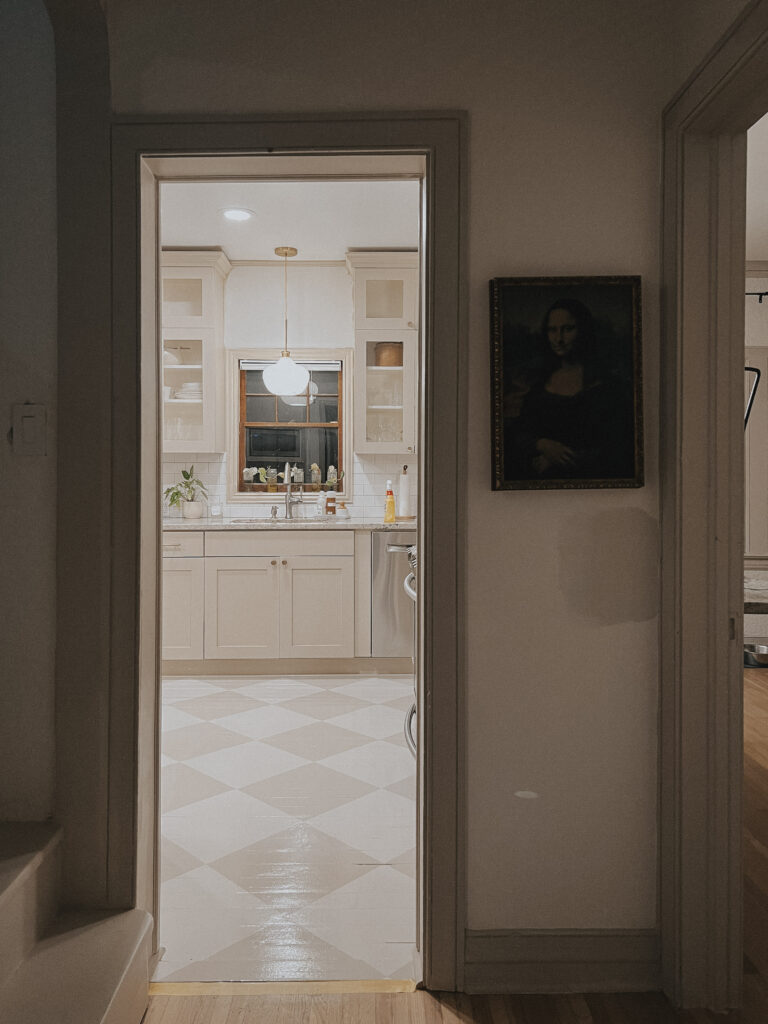
Read the instructions on the can for dry/cure time. You can walk on it after it’s dry, but it is very delicate until it’s fully cured. That means no rugs, no dance parties, and basically treating them with a little extra TLC.
Now you’re completely done! I’m so proud of you! DM or tag me in a before and after picture so I can see what you accomplished!
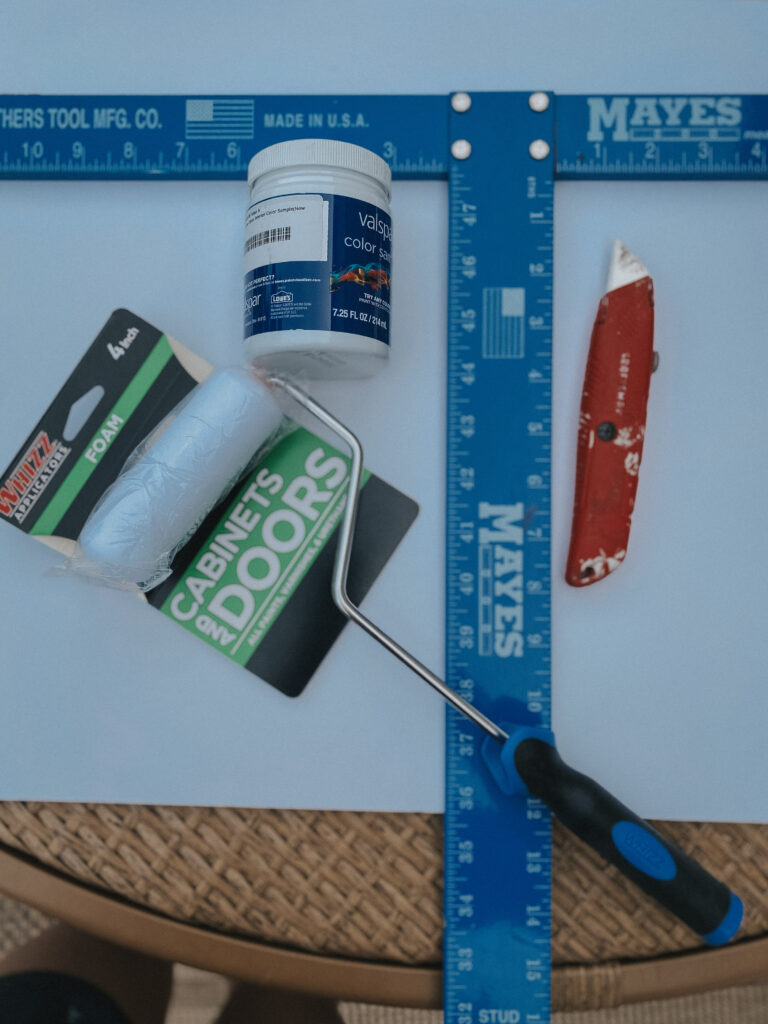
Painted Harlequin Floor Supplies
To Prep:
Vacuum, Mop, TSP, Primer
To Paint:
Paint (base color and secondary color)
Small Roller
Paintbrush
To Measure:
Foam Board, T-Square, or Laser Level
To Mark:
Yellow Frog Tape
Utility Knife
To Seal:
Sealer
Painted Harlequin Floor Tutorial in 28 Seconds
How To Prevent Bleeding
Preventing paint bleeding is crucial for achieving sharp, clean lines when painting a harlequin pattern on floors. Here are some key steps to ensure a bleed-free painting process:
- Proper Surface Preparation: Before painting, ensure the floor is clean, dry, and smooth.
- Quality Painter’s Tape: Use high-quality painter’s tape specifically designed for clean removal and sharp lines. This tape adheres better and is less likely to let paint seep underneath.
- Secure Tape Edges: Press down the edges firmly after applying the tape to create your pattern. You can use a putty knife or a credit card edge to seal the tape tightly against the floor.
- Careful Paint Application: When painting your contrasting color, apply the paint in thin layers and avoid pushing the paint under the edges of the tape. Use a brush or roller and apply the paint perpendicular to the edge of the tape, not along it.
- Timely Tape Removal: Remove the tape while the last coat of paint is still slightly tacky not completely dry. This reduces the chances of the paint peeling off with the tape and helps maintain crisp lines.
- Touch-Ups: If any bleeding occurs, wait until the paint is completely dry, then do touch-ups with a small artist’s brush for precision.
Following these steps will greatly minimize the chances of paint bleeding and ensure that your harlequin pattern comes out with sharp, clean lines.
Leave a Reply
I create some affiliate links through the Amazon Influencer program and the LTK platform. Because of this, I have the ability to earn small commissions from some purchases that you make while using my links (at no cost to you!). I so appreciate your support.

I’ve watched these floors go from brick to wood to painted to painted Harlequin. You tried everything to save these floors but the last design is my favorite. Love them!
Congratulations on one of the prettiest painted floors I’ve seen!
Thanks for following along through all of the craziness, Miriam! It’s definitely been a whirlwind, and I’m happy with where we landed!
They are beautiful! How are they holding up and have you had to touch them up? I am considering this if my 100 year old floors cannot be saved (lots of rot/stains and missing pieces). I think the look is beautiful, I have painted our upstairs wood floors white, but the kitchen may take a bigger beating, so I’d like to know the down the road consequences… thank you!