Pergola Build

Our pergola build is just one portion of our massive backyard renovation! We’ve been working on this for months, and I’m creating tutorials for the most requested projects – starting with our pergola build!
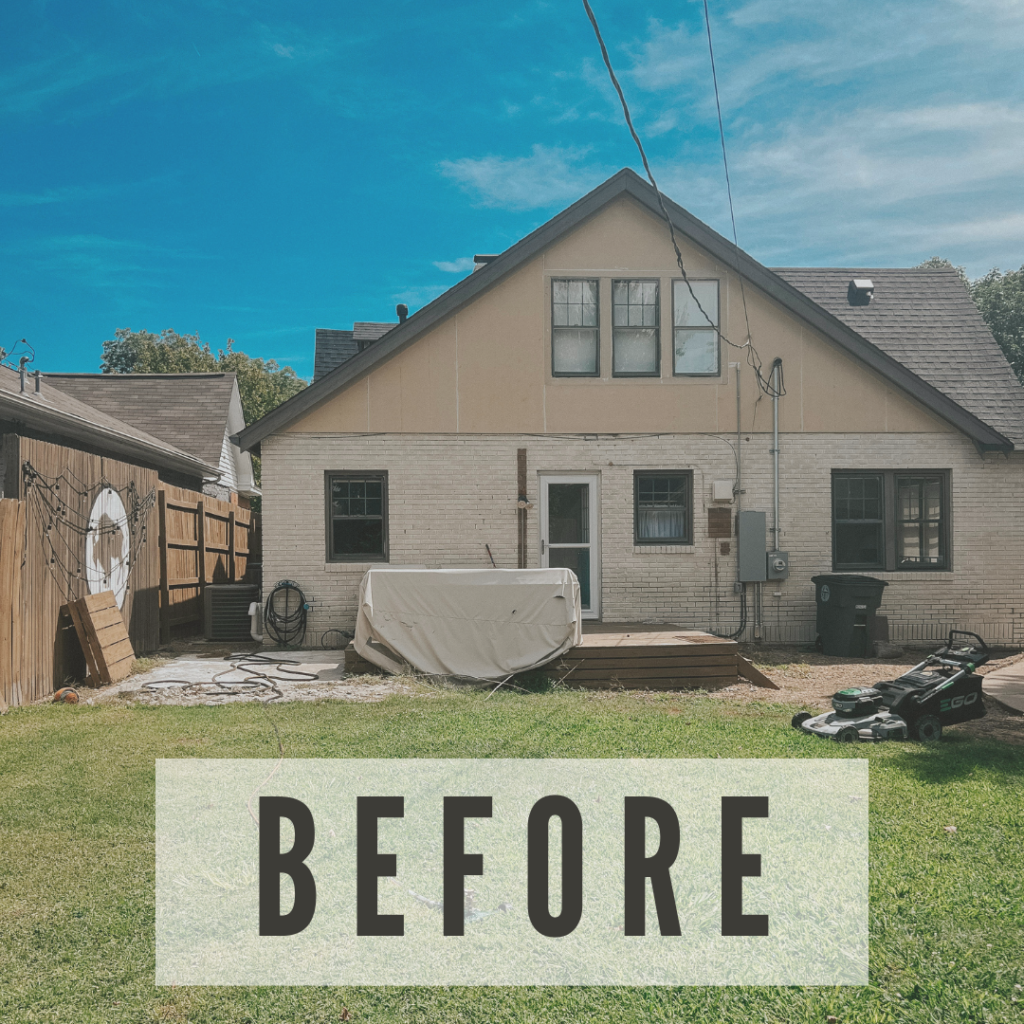
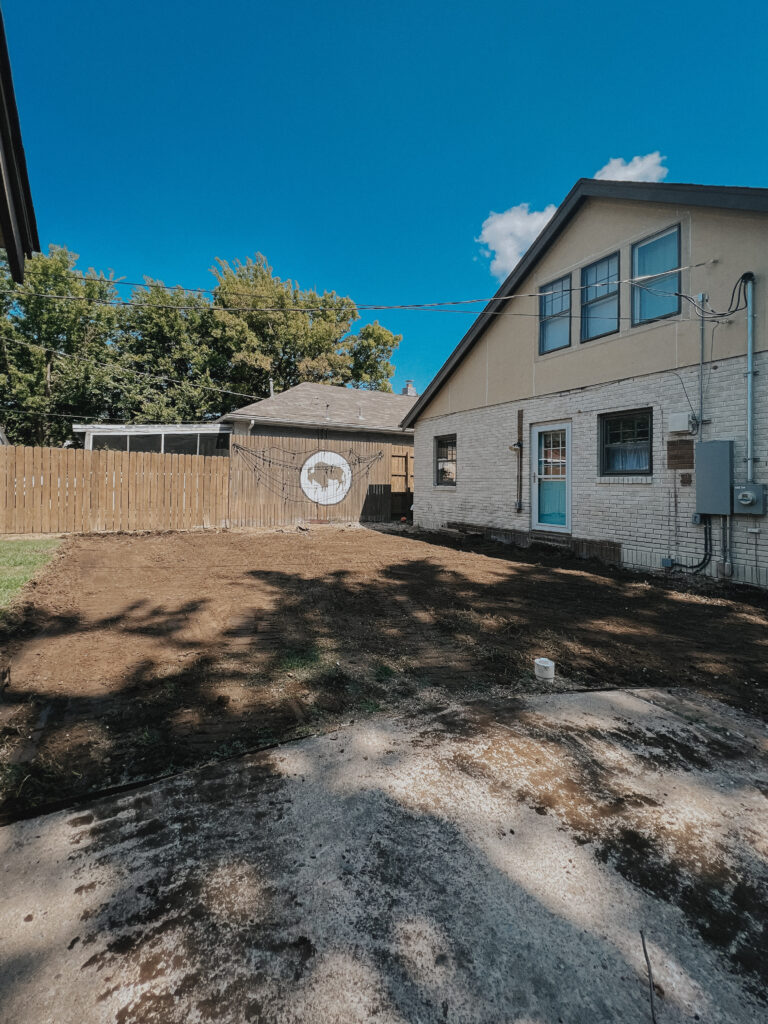
Our Backyard {before}
Here’s our before… because gorgeous things don’t make themselves.
This tutorial could be called “the one with all the videos” because I have more video tutorials than still photos… which makes it easier anyway!
Now let’s get started on the pergola build!
NOTE: I’ve linked all sources at the bottom of this tutorial!
Pergola Build Tutorial
Prep Work
Before we did anything, I killed the grass and dug out a lot of dirt. It was so hard. I mowed the grass with the lowest setting on our mower and then used a weedeater/weedwhacker to cut every single grass blade at the soil line.
I shoveled out the borderline, then realized how much work grading this space was going to be.
In a fun series of events, some friends had some yard work done, and asked the guy with the small bulldozer if he could swing by our place when he was done! AND HE SAID YES! He excavated the excess soil, graded the slope appropriately, and carried off all of the excess topsoil.
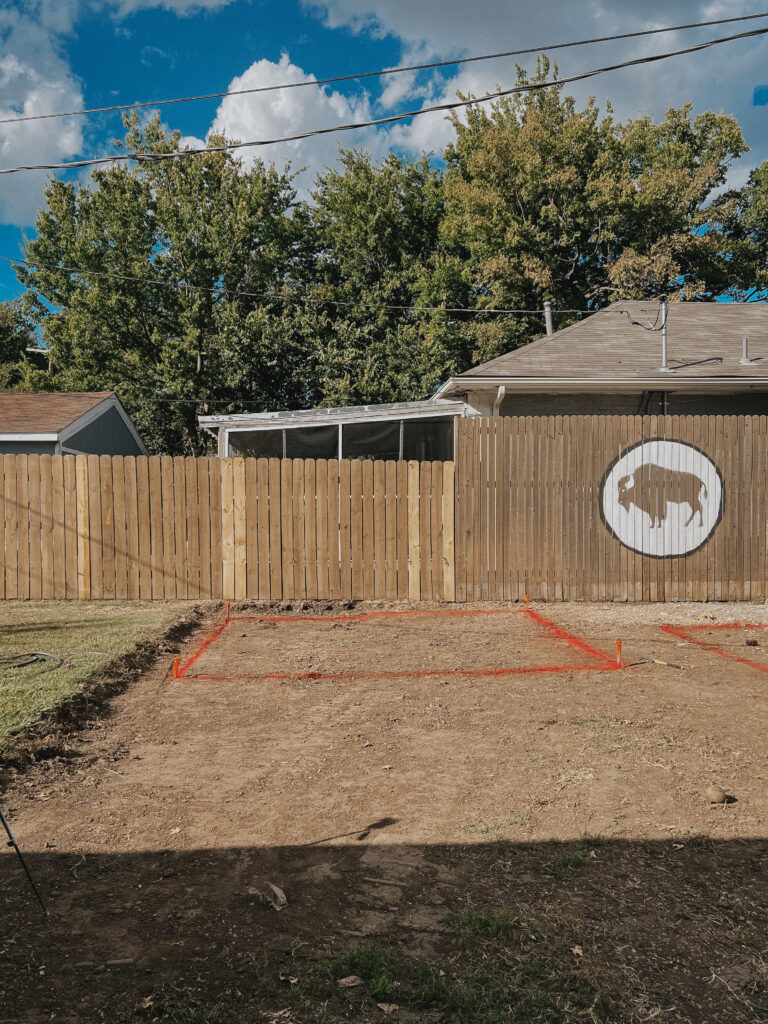
I measured out the 10×12 space for our pergola, added corner stakes, made sure that all of the angles were 90 degrees, and tied a string to each stake. Then I used inverted spray paint directly on top of the string to transfer the marking to the ground.
I wanted to rent an auger, but Jared said we could dig the holes ourselves with a post-hole digger. Between my working full time, him being in CRNA school full time, and the hard Oklahoma dirt… it took us two weeks to dig four holes. Oops! Go ahead and laugh.
Concrete Footers
We needed to make footers for this project so that the pergola is sturdy. Time to cut the sono tubes! These are concrete molds. This step is necessary. We obviously didn’t want our pergola moving around or getting tipsy in heavy winds or after the dirt has settled, so we needed concrete footers to attach the base of our pergola.
We tamped the dirt at the bottom of the holes, added screenings (paver base), tamped, then added paver sand, and tamped again. This gives the tube a solid foundation to sit in. We cut the sono tubes to length with a reciprocating saw, then put them in the holes, making sure we lined up the center of the tube with the spot where the two lines intersected. Then we backfilled the dirt into the hole around the tube and tamped thoroughly.
Time to mix up concrete to go into the tubes! The pergola feet will be bolted into these concrete footers. We mixed up concrete to oatmeal consistency, poured it into the tubes, then added rebar for strength. We used wooden sticks to make sure there weren’t air bubbles, packed the concrete down with a 2×4, then troweled the top until smooth.
This part was fun and very satisfying.
It took about 4 bags of cement per footer (each footer is about 28″ deep – below our frost line).
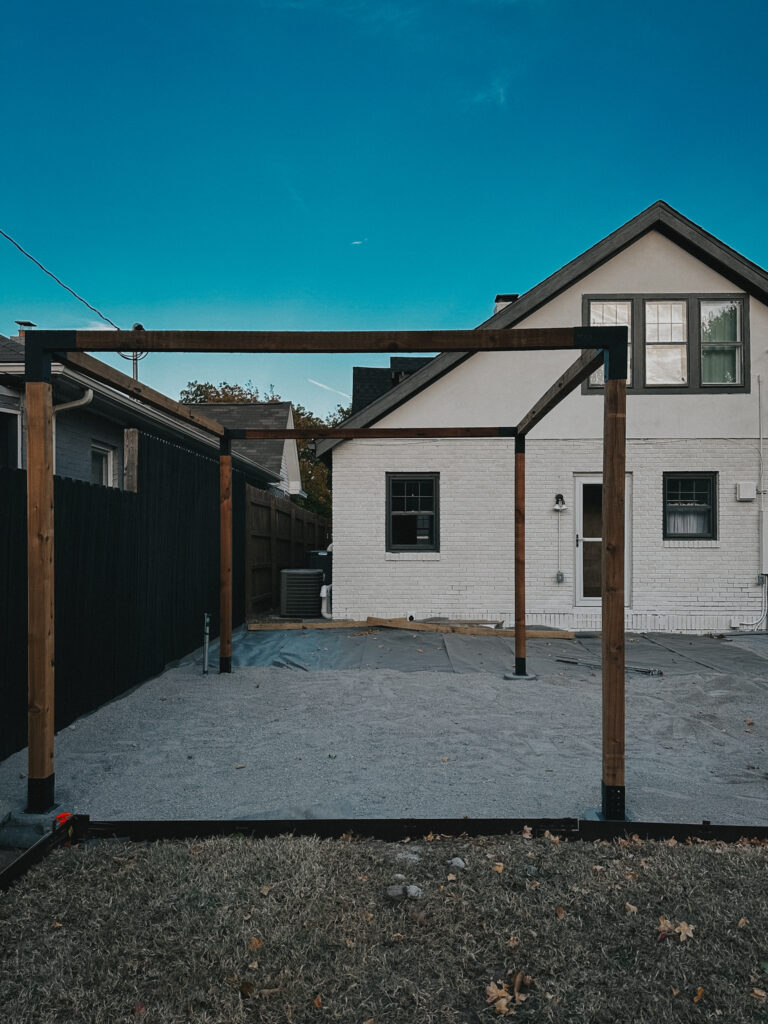
Putting the Pergola Together
Time to start the actual pergola build! We went to our local lumber yard to get our lumber. I recommend getting these from a local lumberyard to get the best quality. Using our handheld planer, we shaved off 1/8″ from the end of every side of each beam because the lumber was slightly thicker than the brackets.
Putting together the pergola itself was pretty simple. If you can put together IKEA furniture and use a drill, you can do this. We just followed the instructions that came with the kit – it’s pretty straightforward. When you are putting the brackets on the corners, they should fit snugly. You can hammer them in – just use a scrap board between the hammer and your brackets for protection.
We did the top first, then lifted it (with a little help from friends) and added the legs!
We secured each leg of the pergola to each concrete footer using bolts!
How do you drill into concrete?
You need a hammer drill, a masonry drill bit, and a can of air.
The can of air is to remove any loose concrete in the hole. If you don’t remove it, your hardware won’t fit in the hole because of the excess material. **Wear eye protection!!**
The Sun Shade
Our pergola build kit came with a sun shade for the top. I added an additional one to the back because it adds a bit of privacy and wind/sun protection, but after living with it for a couple of weeks, I wasn’t loving the sunshade on the top. It didn’t stay very tight, and I didn’t love the look. I felt like it lowered the style, so I took it off and added cedar 2×4 posts to create a top!
Pergola Build: Adding Rafters
Similar to putting the main beams of the pergola up, I cut the 2×4’s to size using a miter saw, then used my planer to trim each end so that they fit into their brackets. I attached each to the front and back at 12″ increments!
Here’s a quick video if you’re a visual learner:
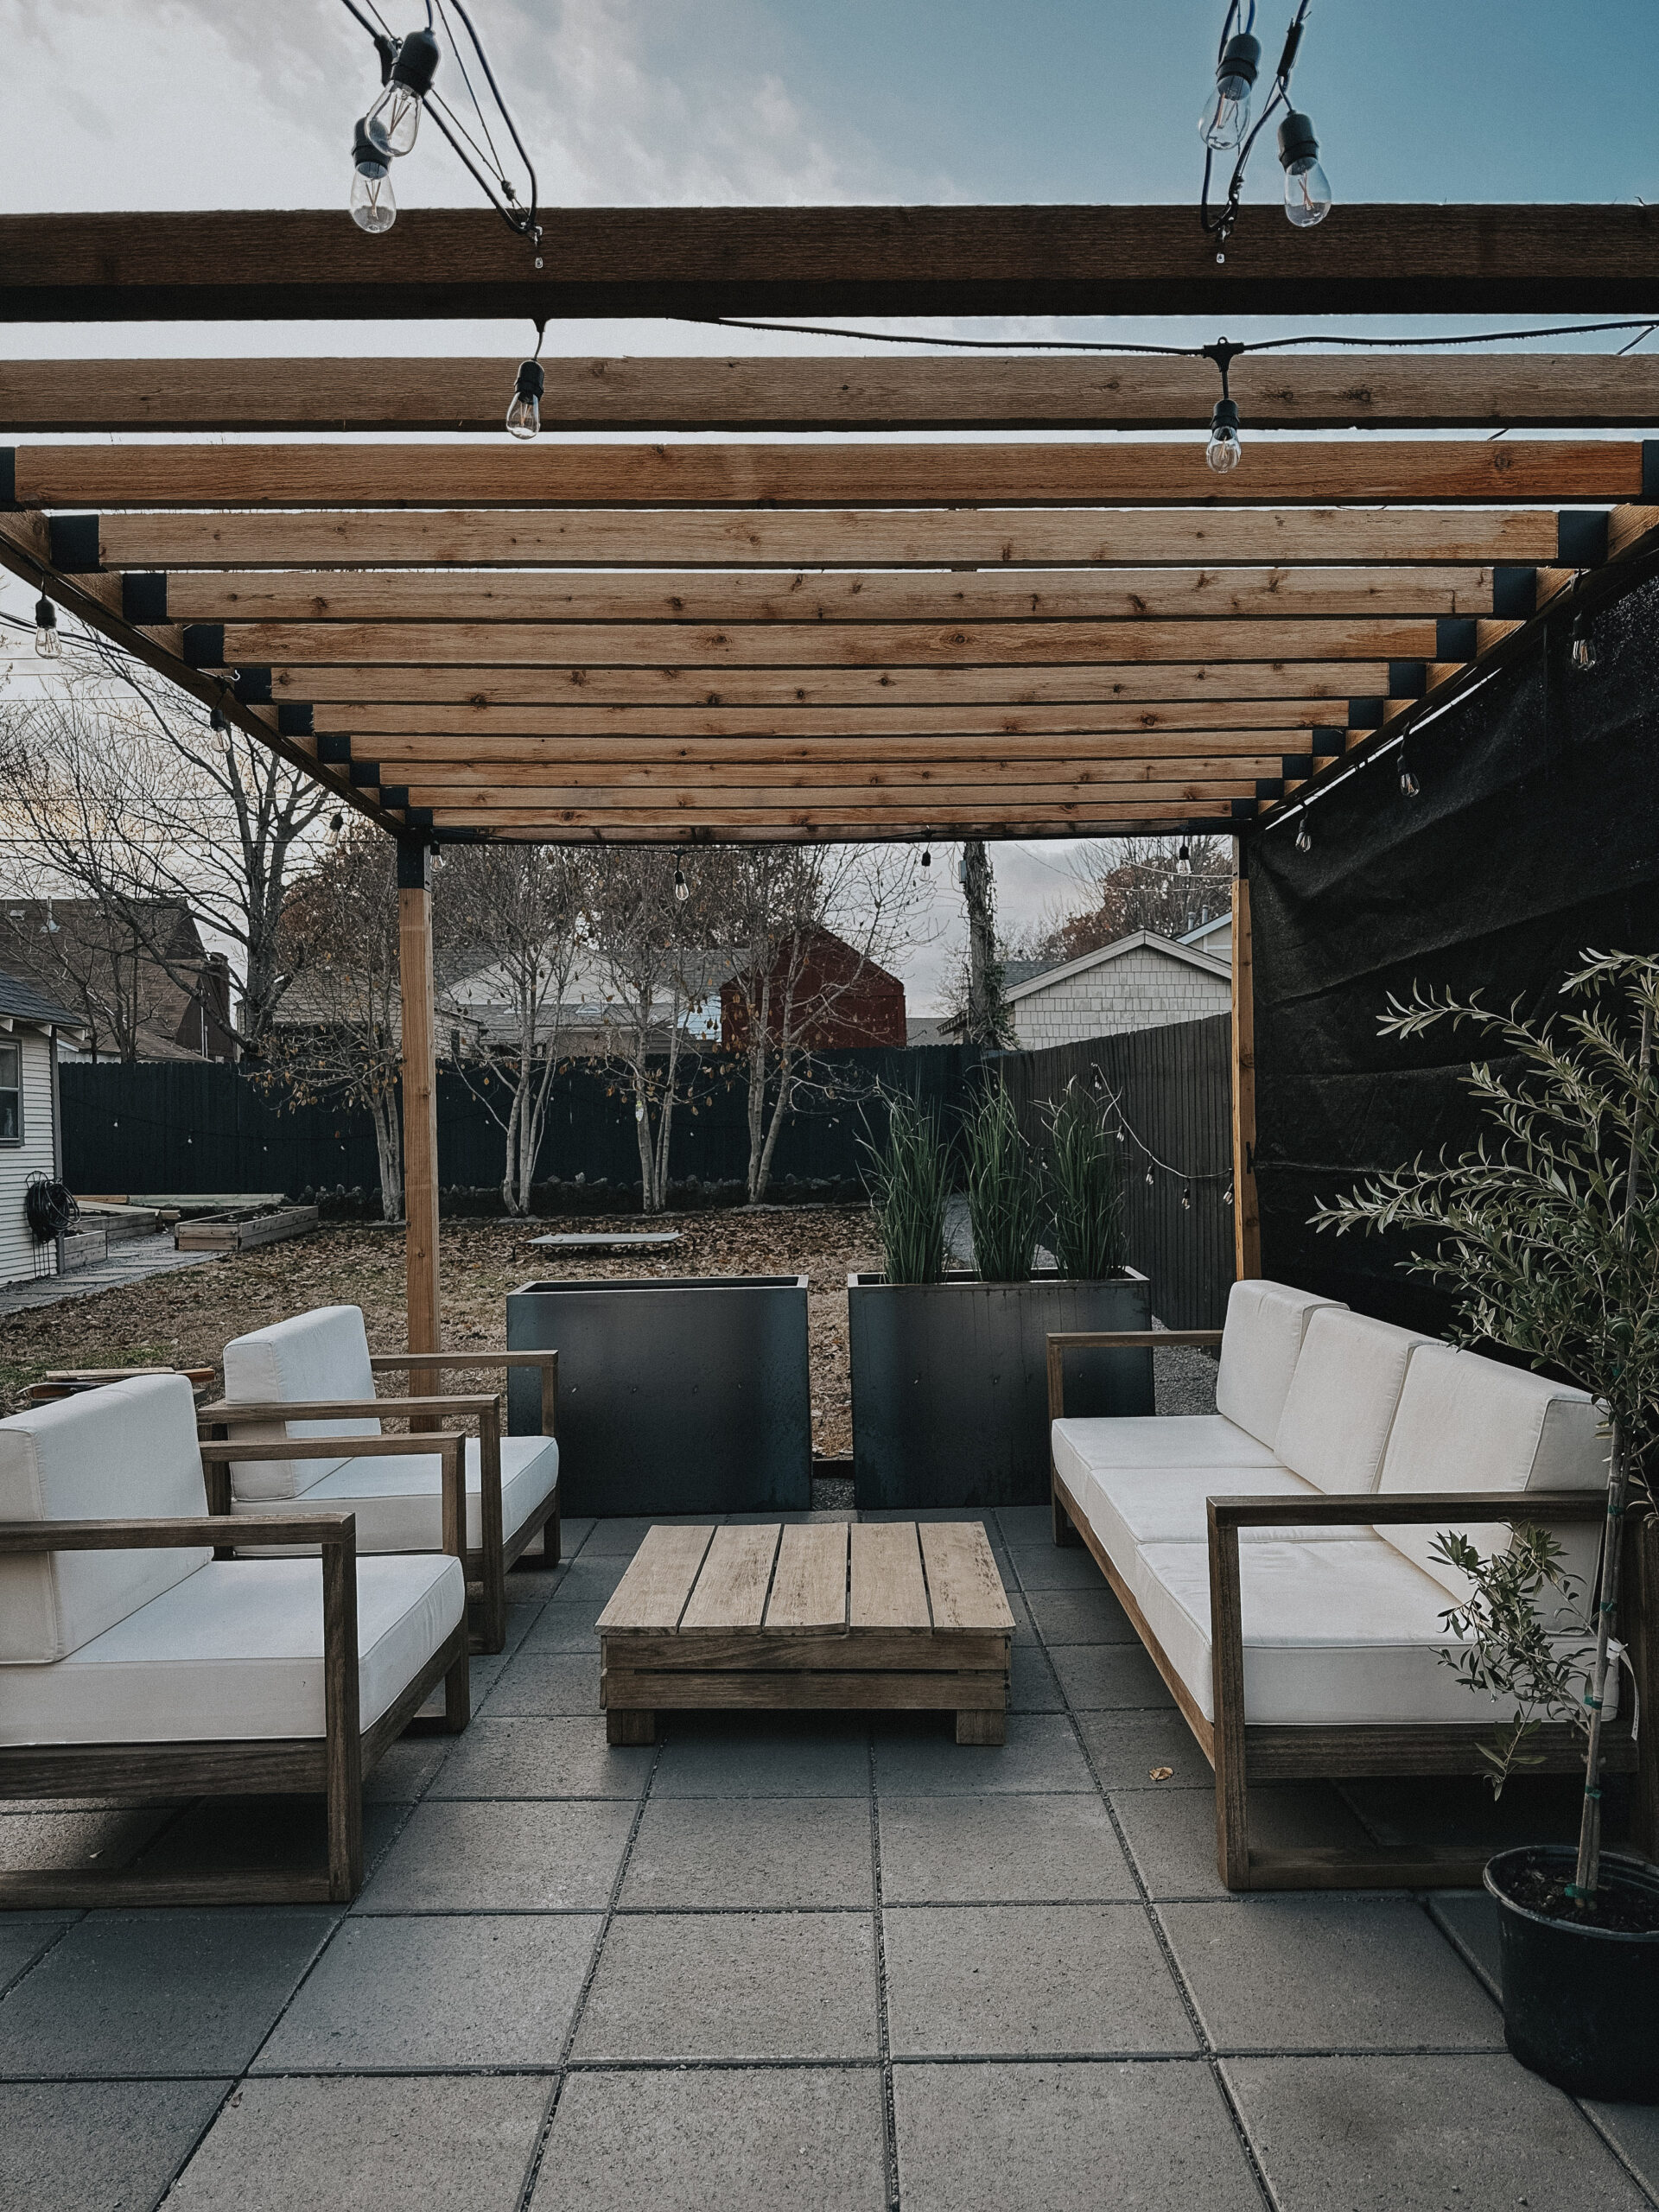
Lots of people stop here! Totally fine! It looks great, and is a super classic and classy pergola! I really wanted a comfortable place to hang out in during all weather, though… so we went a step further!
Pergola Build – Adding a Roof
After Jared finished his CRNA classes for the semester, we decided to tackle adding a roof to our pergola. We went back and forth (with each other and with you!) over a gray roof vs. a clear roof. Eventually, we made the decision based on how it would age. We think the gray will be easier to keep clean, and won’t yellow as quickly, so that’s what we went with!
JUST KIDDING.
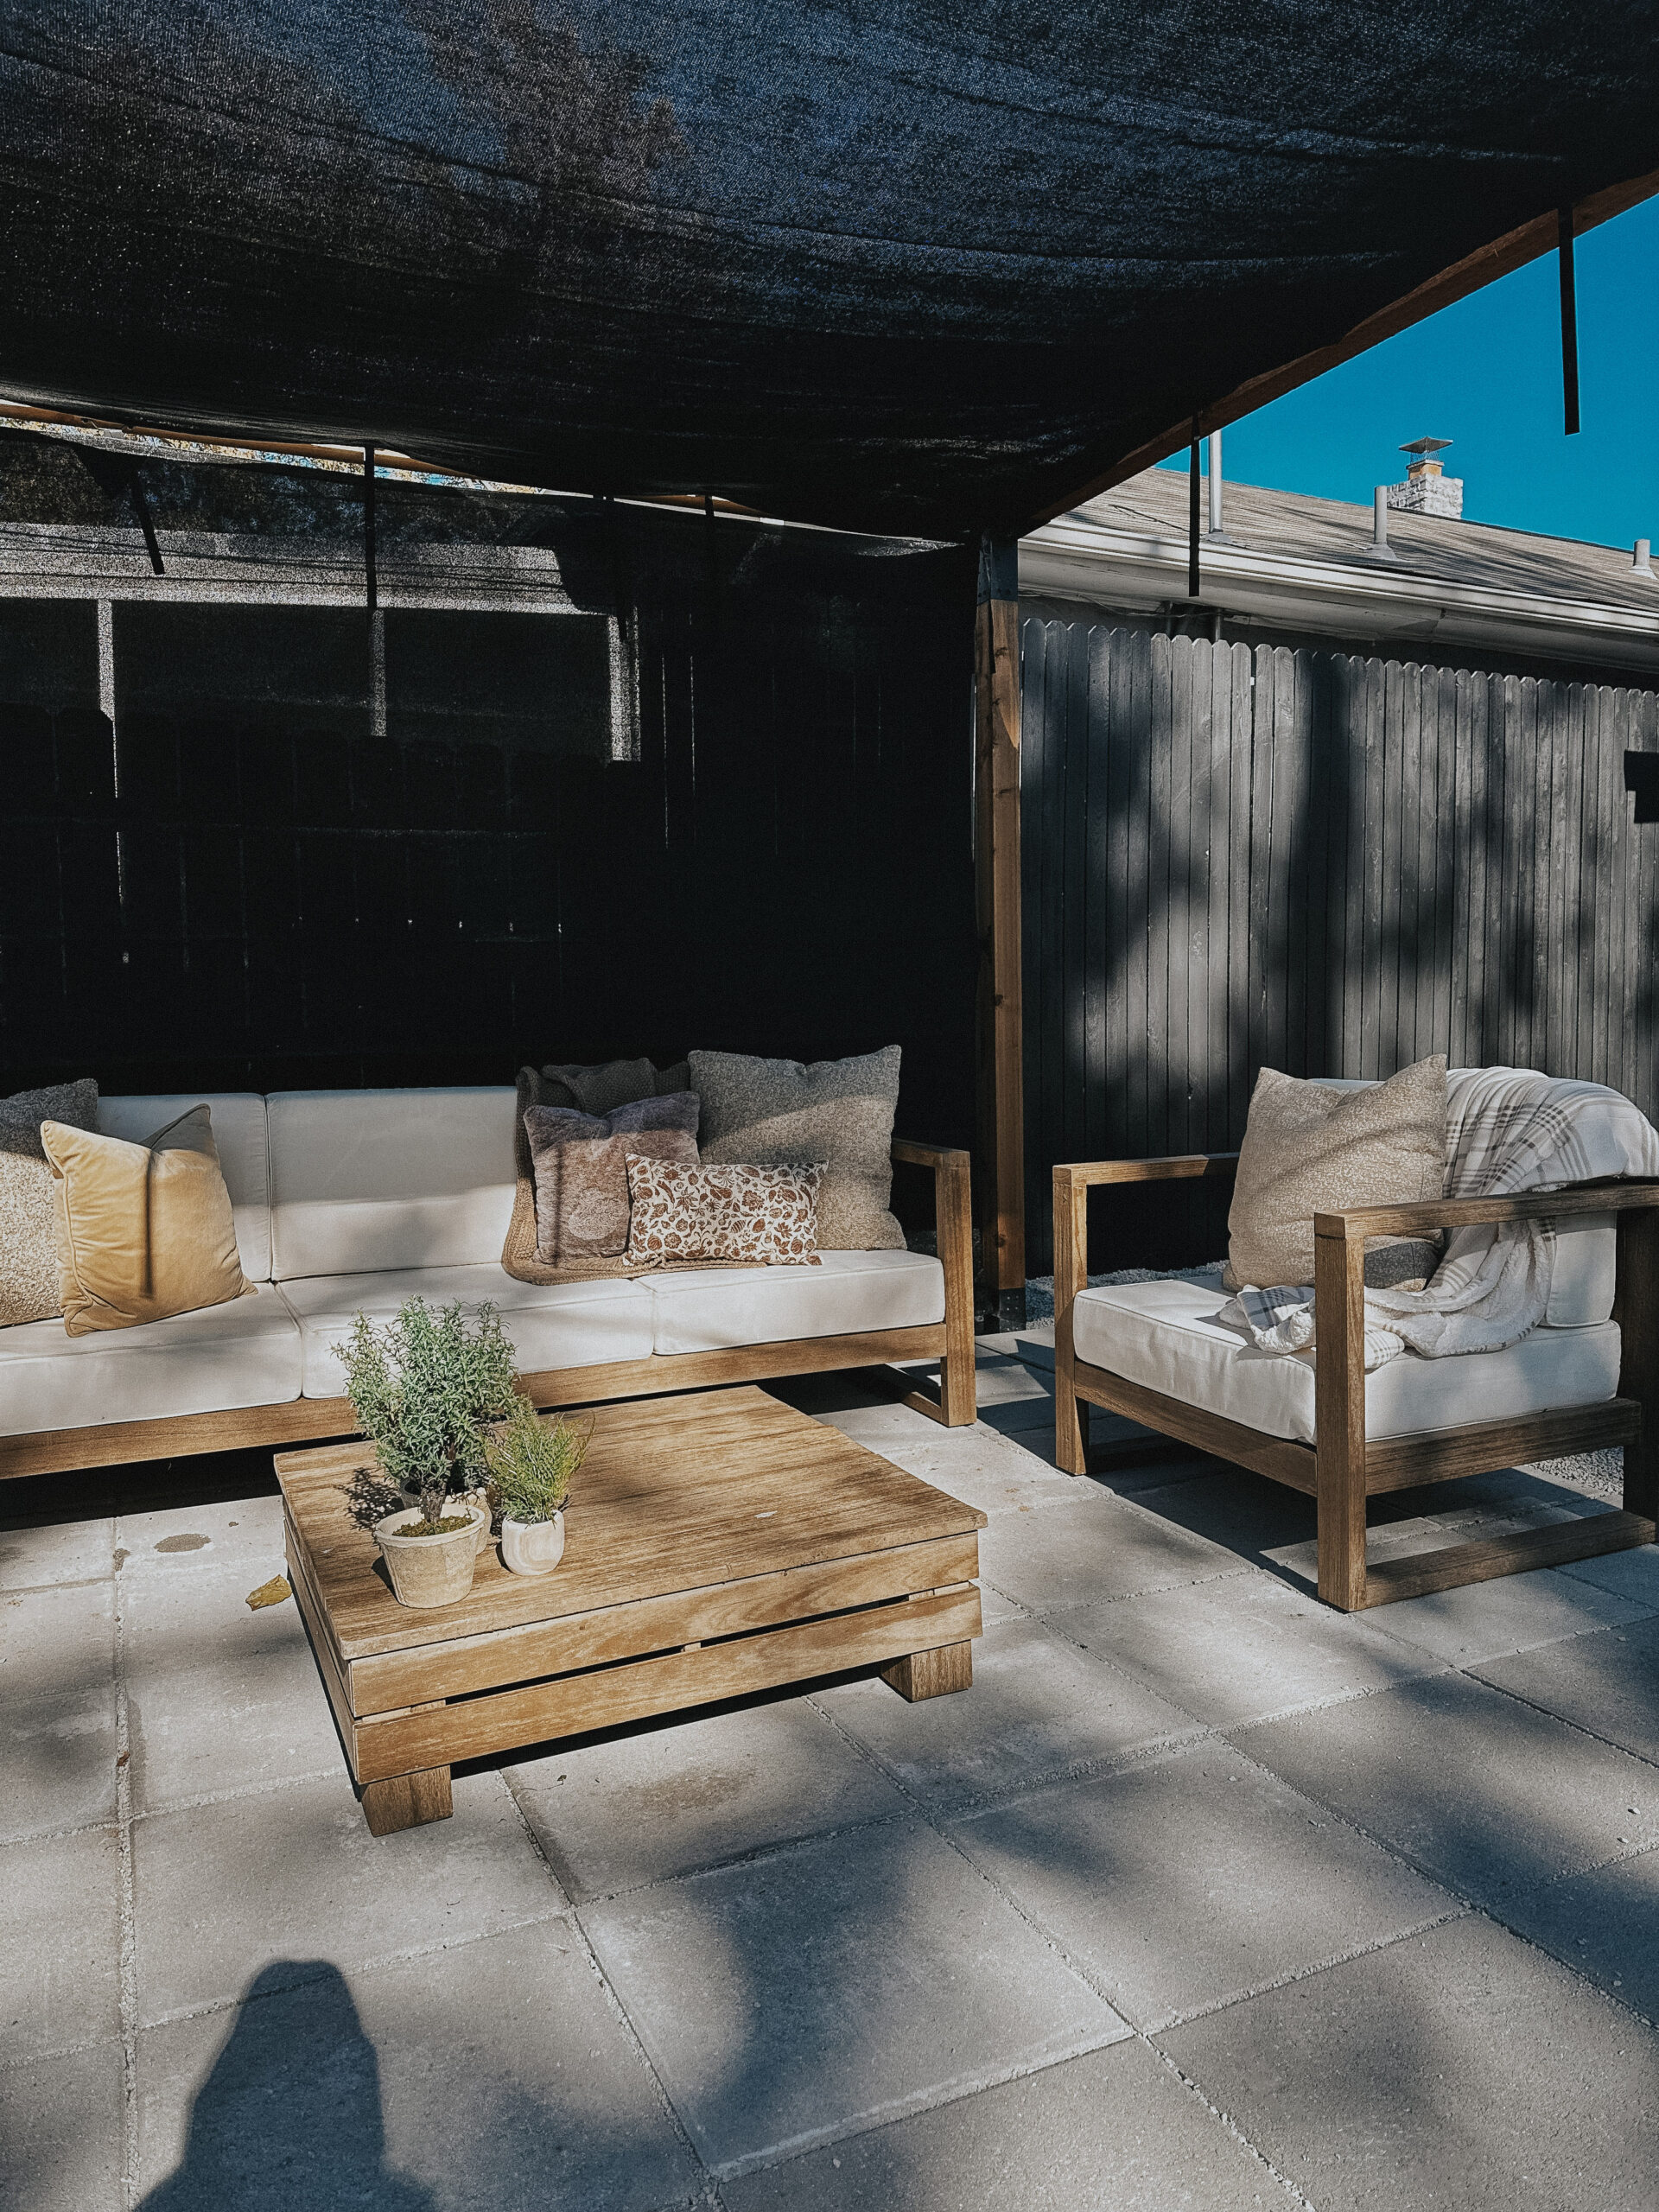
We wanted to add that simple sloped corrugated roof and went through a lot of work to make that happen. But in the end, we decided that we weren’t willing to risk the wind lifting or damaging the structure (we live in Tulsa, so have lots of heavy winds and tornadoes). So now it’s officially all done! Cute styling to come, but here’s how the structure looks now!

The End!
You did it! You either made it through this long tutorial OR you experienced your own pergola build! Either way, I’m so proud of you.
All supplies are listed below!
Pergola Build Supplies
Pergola
Toja pergola kit or Alternate pergola kit from Amazon
cedar posts 4x4x12 (qty 8)
Tools and Supplies:
post hole digger (or rent an auger at Home Depot)
Optional for rafters on top:
cedar 2×4’s (qty 11)
Want to watch the entire pergola build?
Leave a Reply
I create some affiliate links through the Amazon Influencer program and the LTK platform. Because of this, I have the ability to earn small commissions from some purchases that you make while using my links (at no cost to you!). I so appreciate your support.